Integrating Jenkins with Azure Active Directory
In Unified Authentication and Authorization for Homelab Applications Using Azure AD, I described how I currently implement unified authentication and authorization. In this post, I will walk through how to integrate Jenkins with Azure AD.
For applications like Jenkins, I choose to deploy them on a Kubernetes cluster for the following main reasons:
- Reduced maintenance overhead. To upgrade Jenkins, for example, I only need to update the Helm values and redeploy.
- Agents can auto-scale within the Kubernetes cluster without any additional configuration on my part.
Deployment
To keep the environment clean, I will create a new namespace and deploy Jenkins into it.
Create the namespace with the following command:
1 | kubectl create ns jenkins-lab |
Note: I used an imperative command to create the namespace. This approach is not recommended for production environments. See Kubernetes Object Management for details.
It is recommended to deploy Jenkins using Helm. Jenkins provides an official chart.
1 | helm repo add jenkins https://charts.jenkins.io |
A custom values file is required. For this deployment I will use the following configuration:
1 | controller: |
Note that the AAD App’s reply URL requires a secure communication channel — HTTPS in this case. I configured an Ingress with TLS enabled. A future post will cover how to automatically provision SSL certificates.
If you need additional customization, refer to the Jenkins Chart default values.yaml.
Jenkins deployment is now complete. The next step is to register an AAD application.
Registering an Azure AD Application
There are two ways to register an Azure AD application:
- Through the Azure AD Portal or Azure Portal.
- Through the Azure CLI.
Registering via the web portal is more interactive and intuitive, but the process is difficult to automate and not particularly interesting. I will use the CLI approach, which can be automated later.
Register an AAD application named jenkins-lab:
1 | appName="jenkins-lab" |
Gotcha: The Azure CLI official documentation and the output of az --help can differ significantly. It is recommended to use --help directly to get accurate help information.
Since we will use groups for permission management, groupMembershipClaims needs to be set to SecurityGroup:
1 | appId=$(az ad app list --display-name $appName | jq -r -c ".[0].appId") |
Next, grant the AAD application the User.Read.All, Group.Read.All, and People.Read.All application permissions using the following commands:
1 | microsoftGraphAppId=$(az ad sp list --query "[?appDisplayName=='Microsoft Graph'].appId" --all | jq -r -c ".[]") |
Integrating Jenkins with AAD
Step 1: Log in to Jenkins. The default username is admin. Retrieve the password with the following command:
1 | kubectl exec --namespace jenkins-lab -it svc/jenkins -c jenkins -- /bin/cat /run/secrets/chart-admin-password && echo |
Step 2: Navigate to Manage Jenkins -> Security -> Configure Global Security.
Step 3: Run the following command to obtain the Azure AD application credentials:
1 | az ad app credential reset --id $appId |
The output will look like this:

The credential is valid for one year.
Step 4: Configure the Security Realm and save.
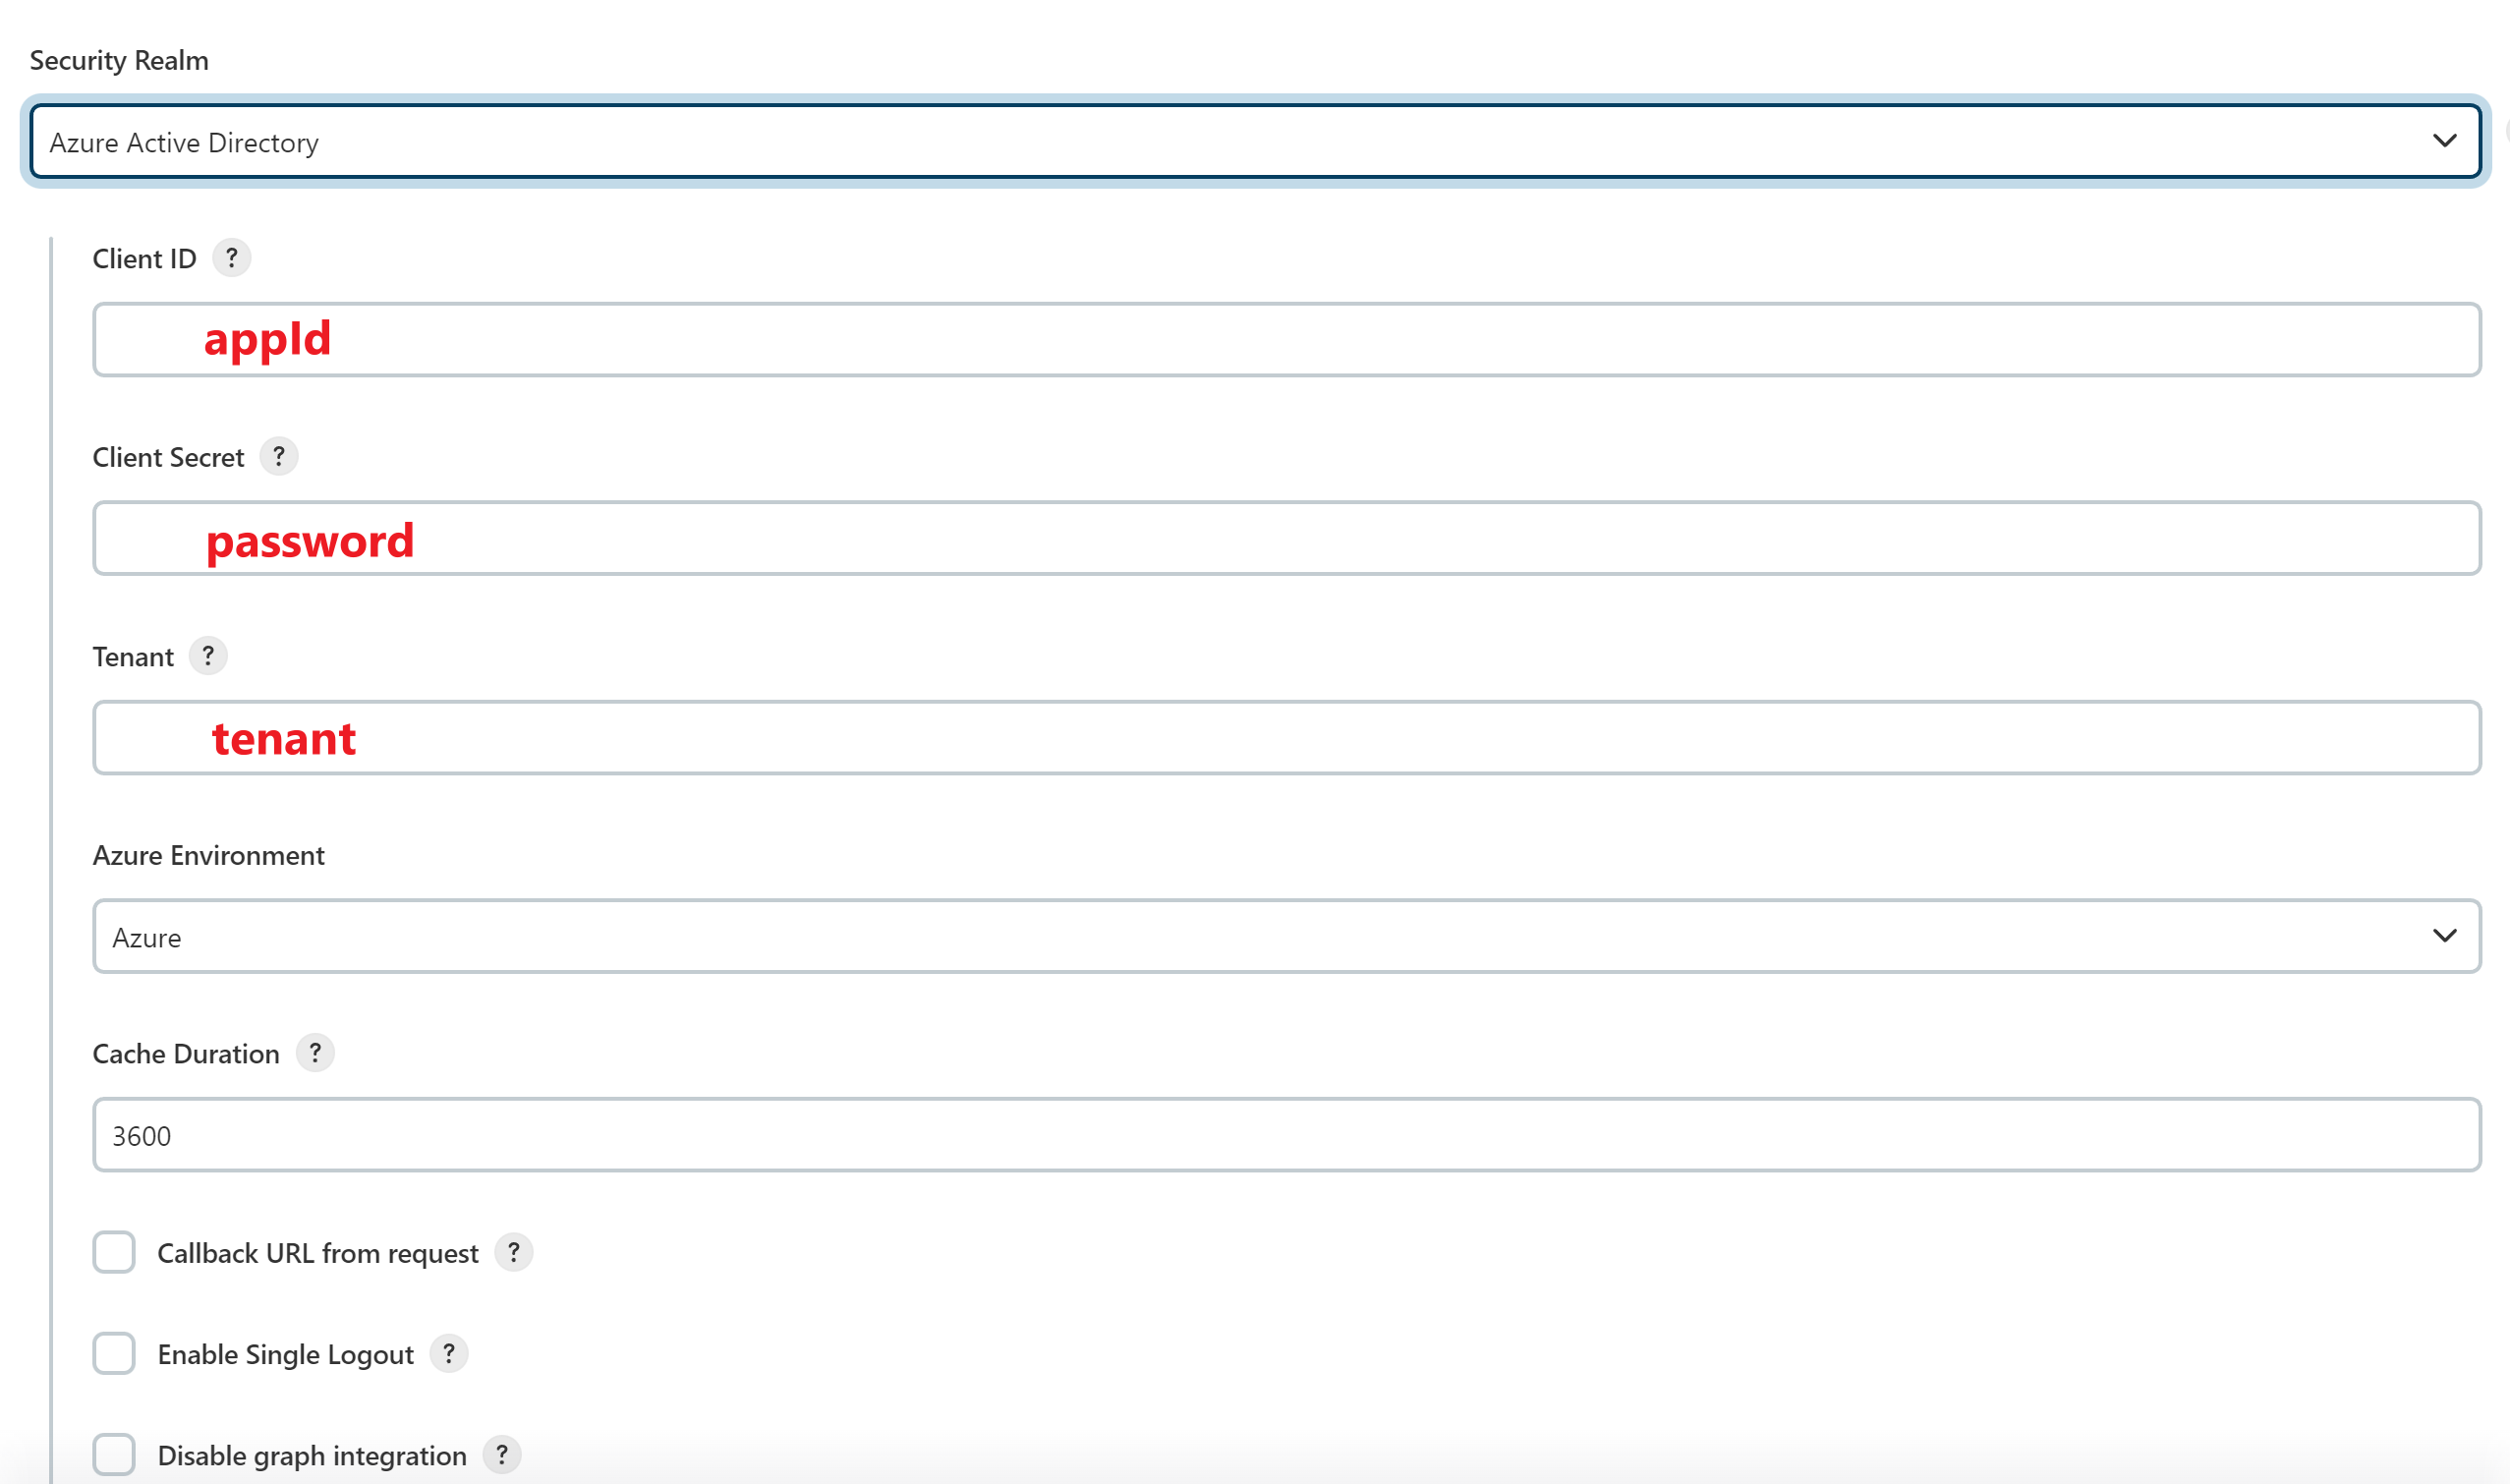
- Client ID: Use the
appIdvalue from the Step 3 output. - Client Secret: Use the
passwordvalue from the Step 3 output. - Tenant: Use the
tenantvalue from the Step 3 output.
Step 5: After saving, log out.
Step 6: Navigate back to Jenkins — it will automatically redirect to the Microsoft login page.
Step 7: Configure permissions and save.
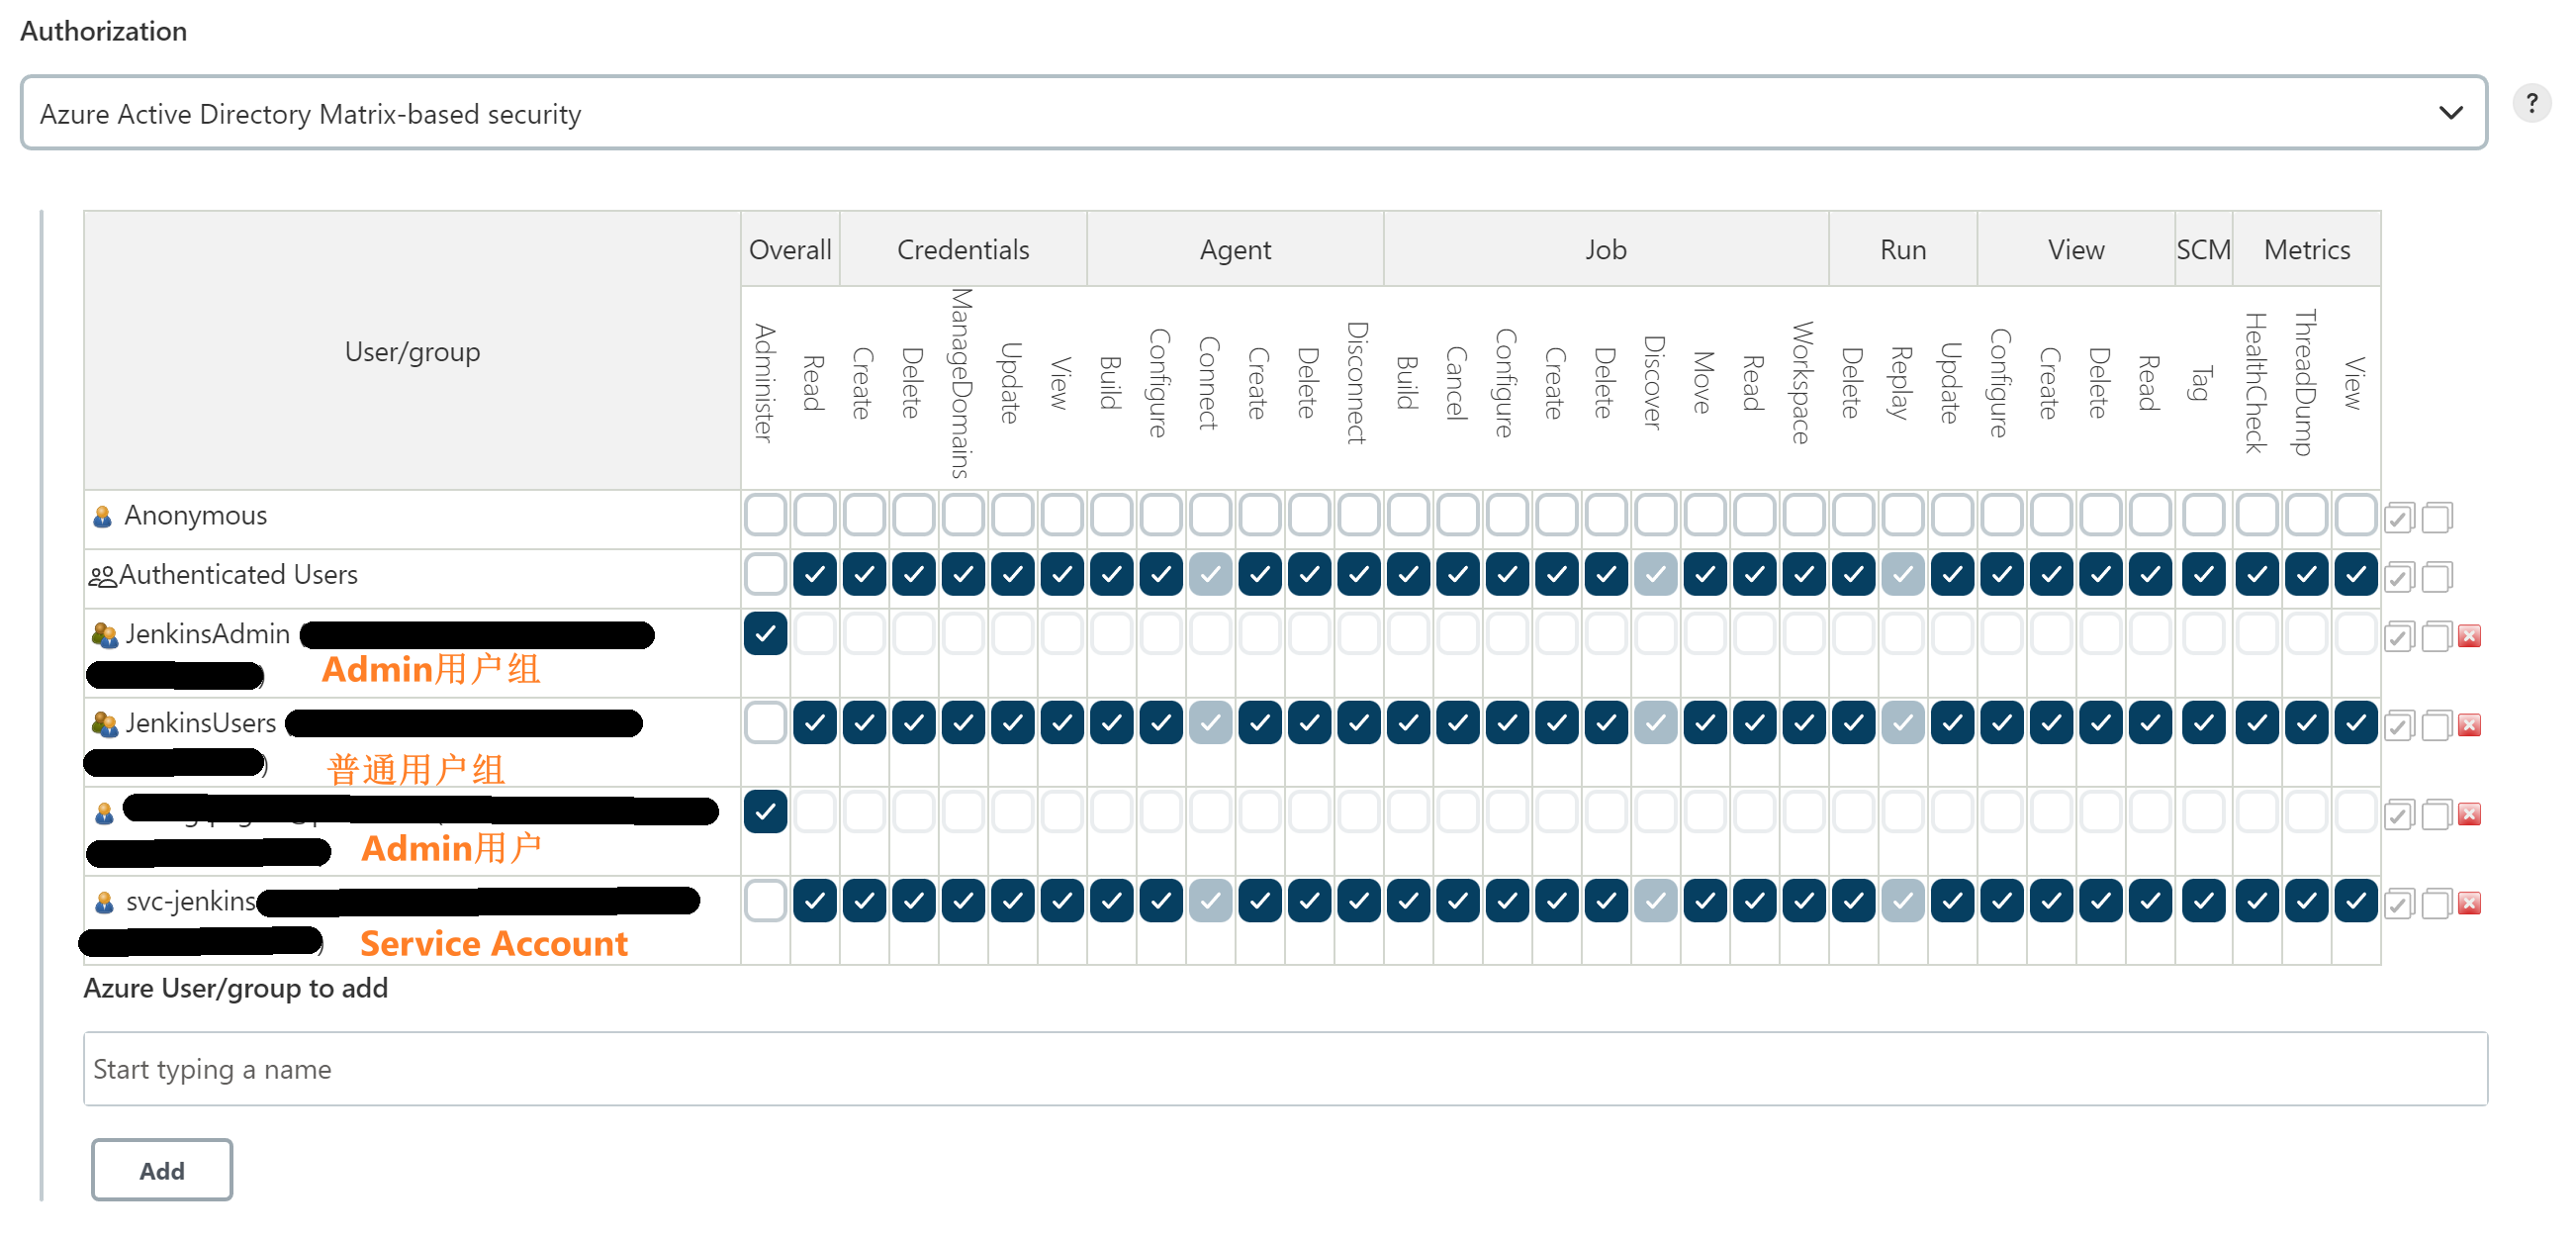
In the Start typing a name field, enter a username or group name, add it, and assign the appropriate permissions.
Summary
There is still a significant amount of manual work involved in this integration. I plan to improve this using JCasC in the future. Why not use it now? Because I tried it before and it didn’t work.