Integrating Tencent Cloud with Azure AD for Multi-Role SSO
In a previous post, “Unified Authentication and Authorization for Homelab Applications Using Azure AD,” we discussed in detail how to use Azure AD for centralized authentication. In “Jenkins Integration with Azure AD,” we covered how a self-hosted Jenkins instance can integrate with Azure AD.
In this post, I will walk through how to integrate Tencent Cloud with Azure AD.
Step 1: Create an Application in Azure
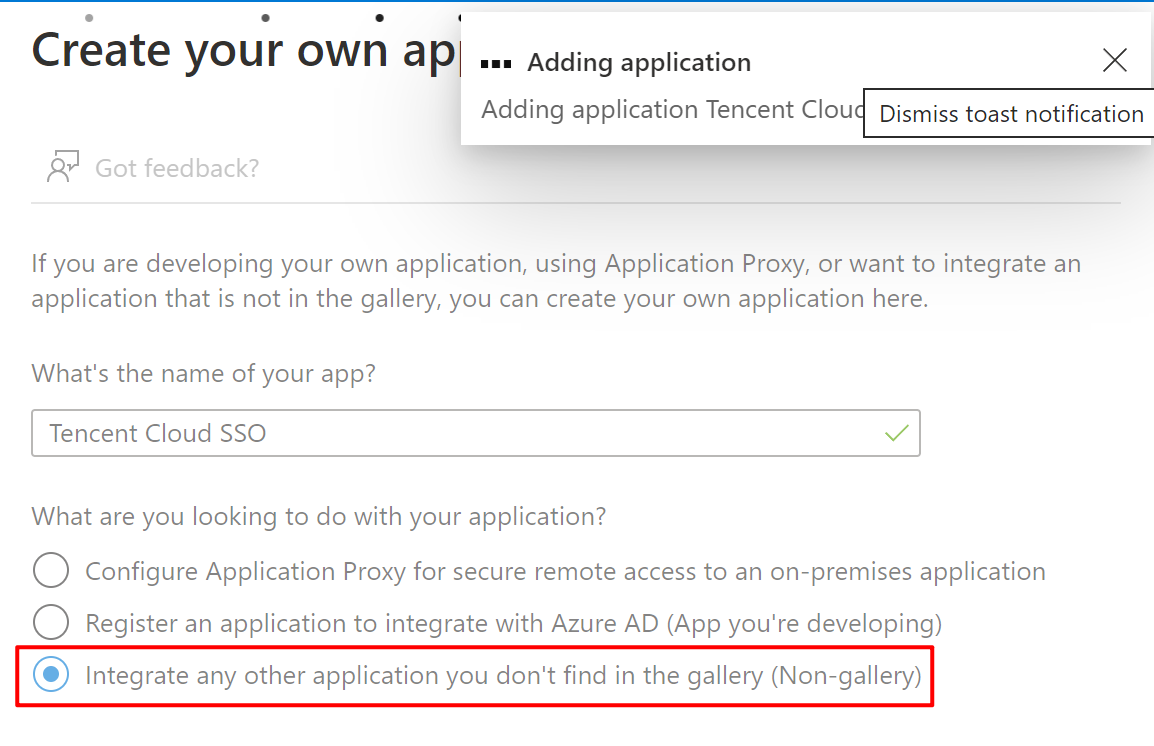
1. Create a New Application in Enterprise Applications
In Azure Active Directory, navigate to Enterprise Applications and create a new application. As shown in the screenshot below, this post uses “Tencent Cloud SSO” as the application name.
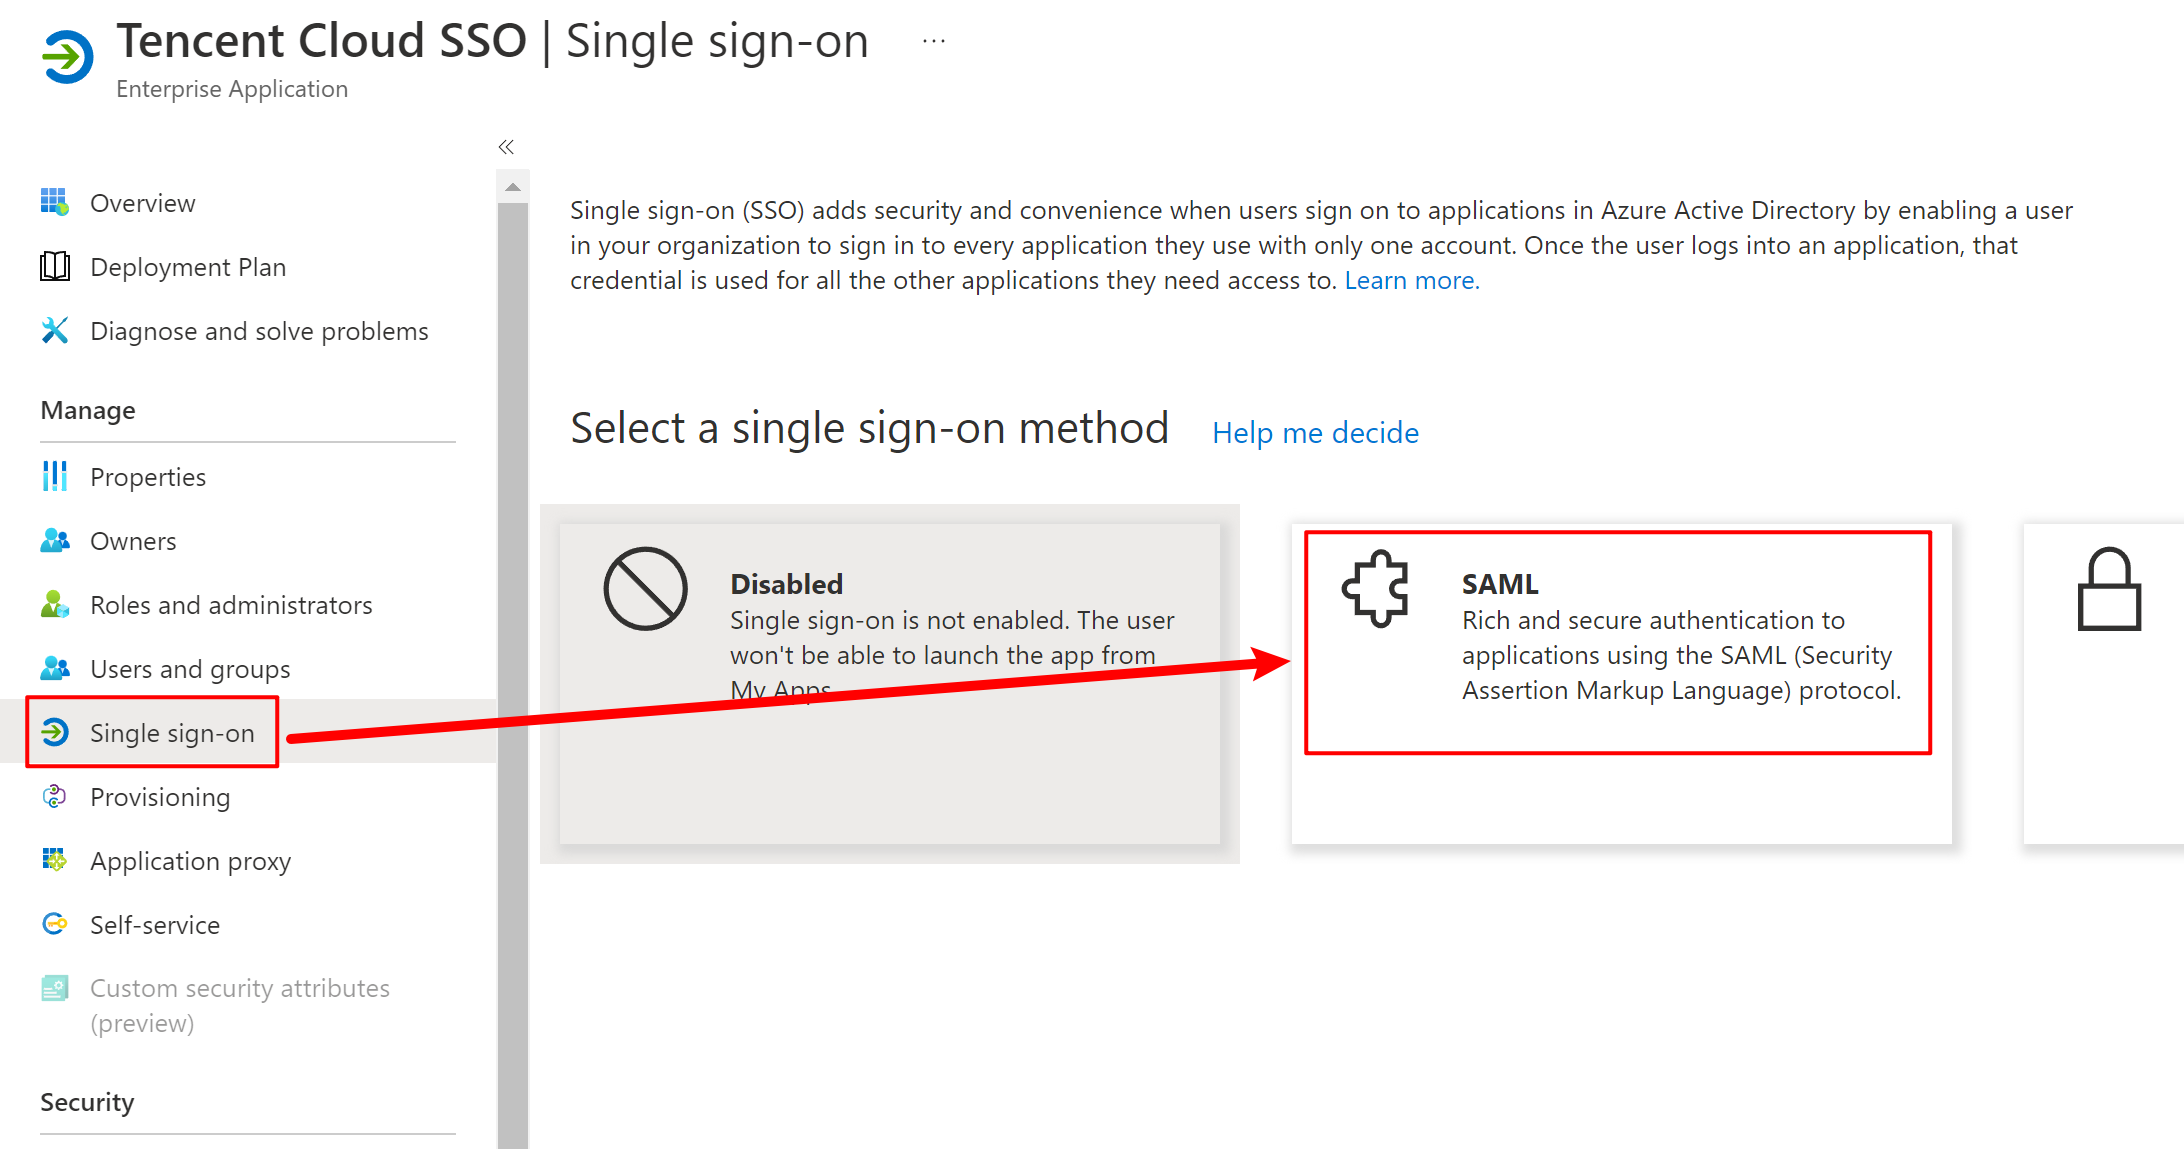
2. Configure SSO
After the application is created, open it and set up SAML-based SSO as shown below.
There are five sections to configure, as shown in the screenshot below.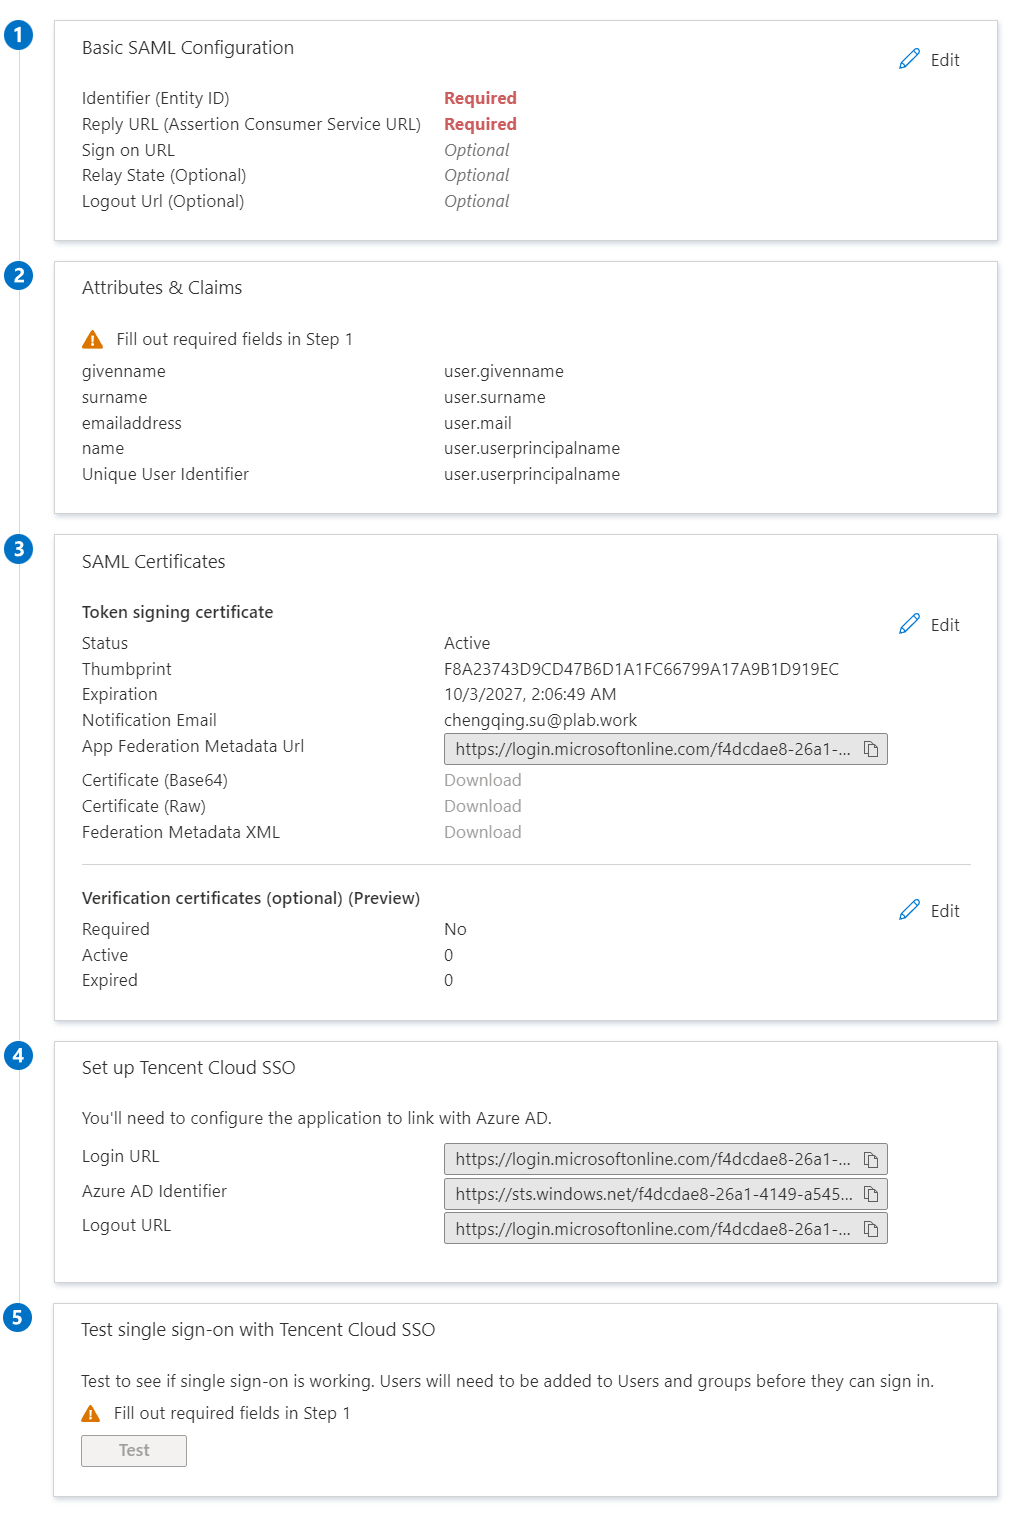
We mainly need to configure the first two sections.
Basic Configuration
Follow the screenshot below for the settings. The Identifier (Entity ID) and Reply URL (Assertion Consumer Service URL) values are listed in the table below.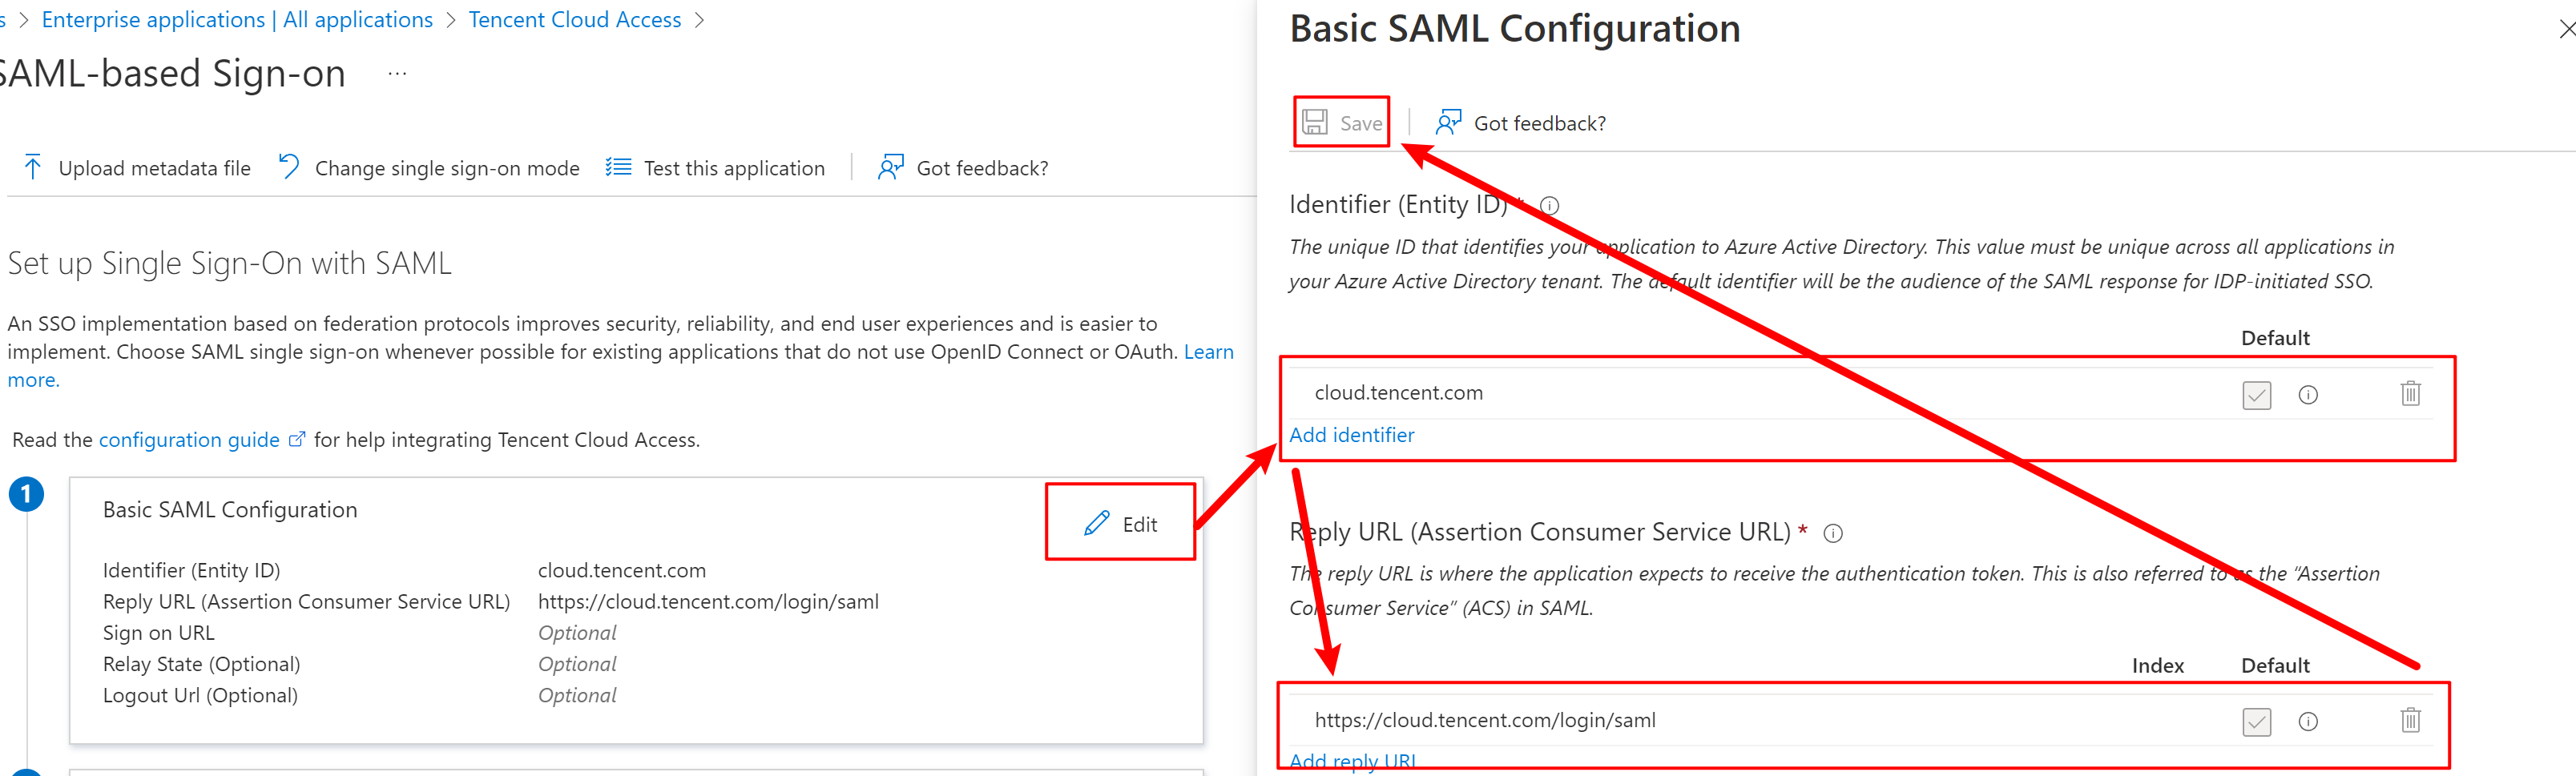
| Site | Identifier (Entity ID) | Reply URL (Assertion Consumer Service URL) |
|---|---|---|
| China | cloud.tencent.com | https://cloud.tencent.com/login/saml |
| International | intl.cloud.tencent.com | https://intl.cloud.tencent.com/login/saml |
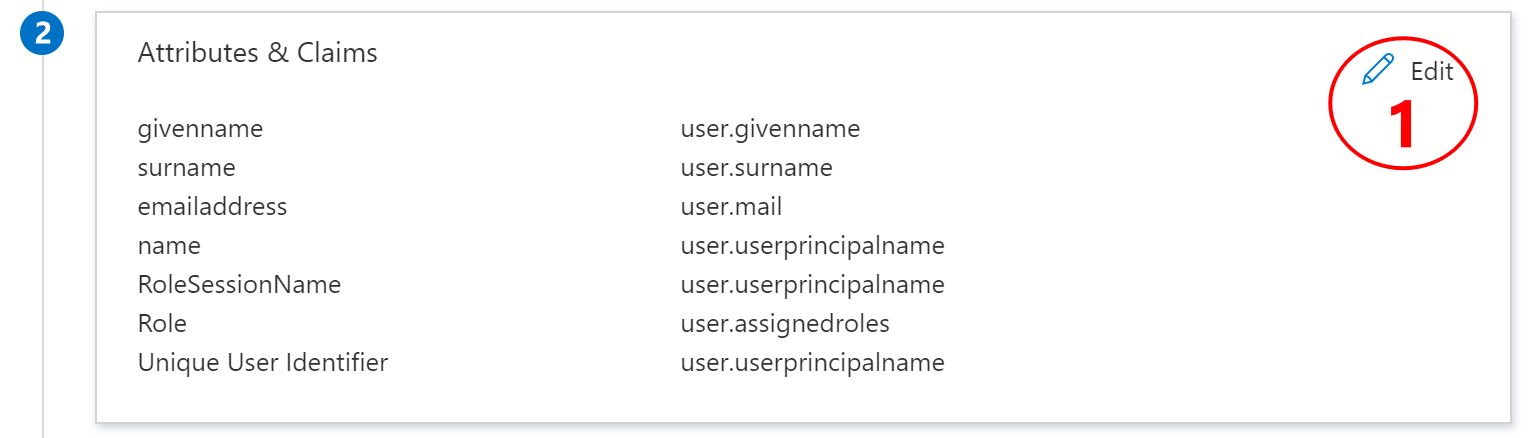
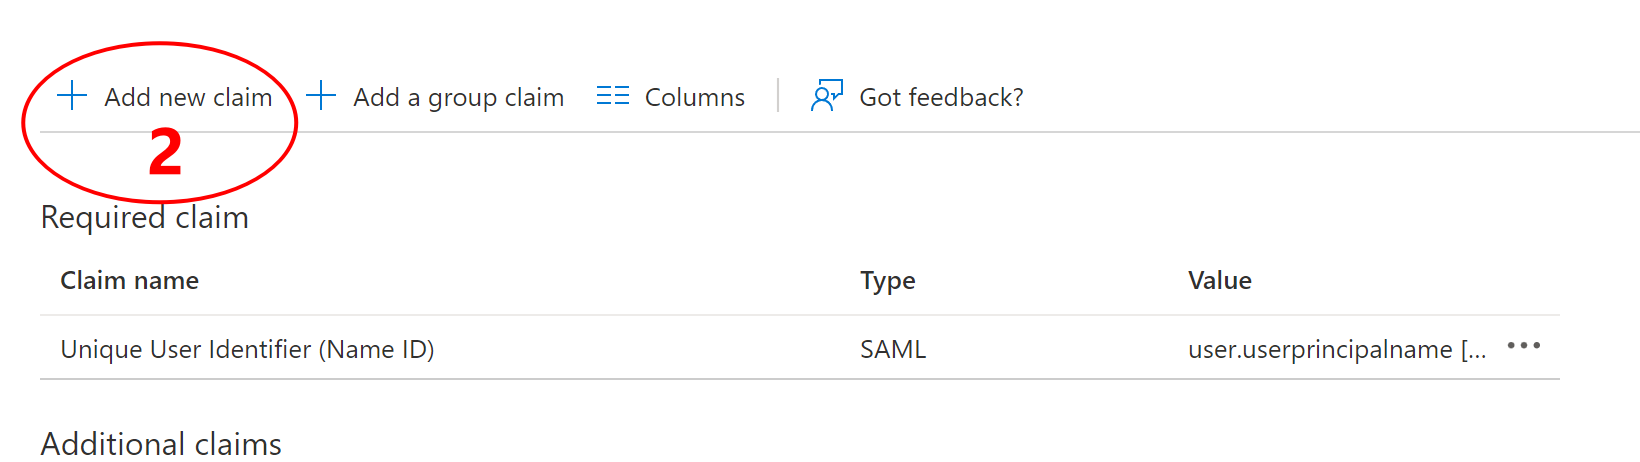
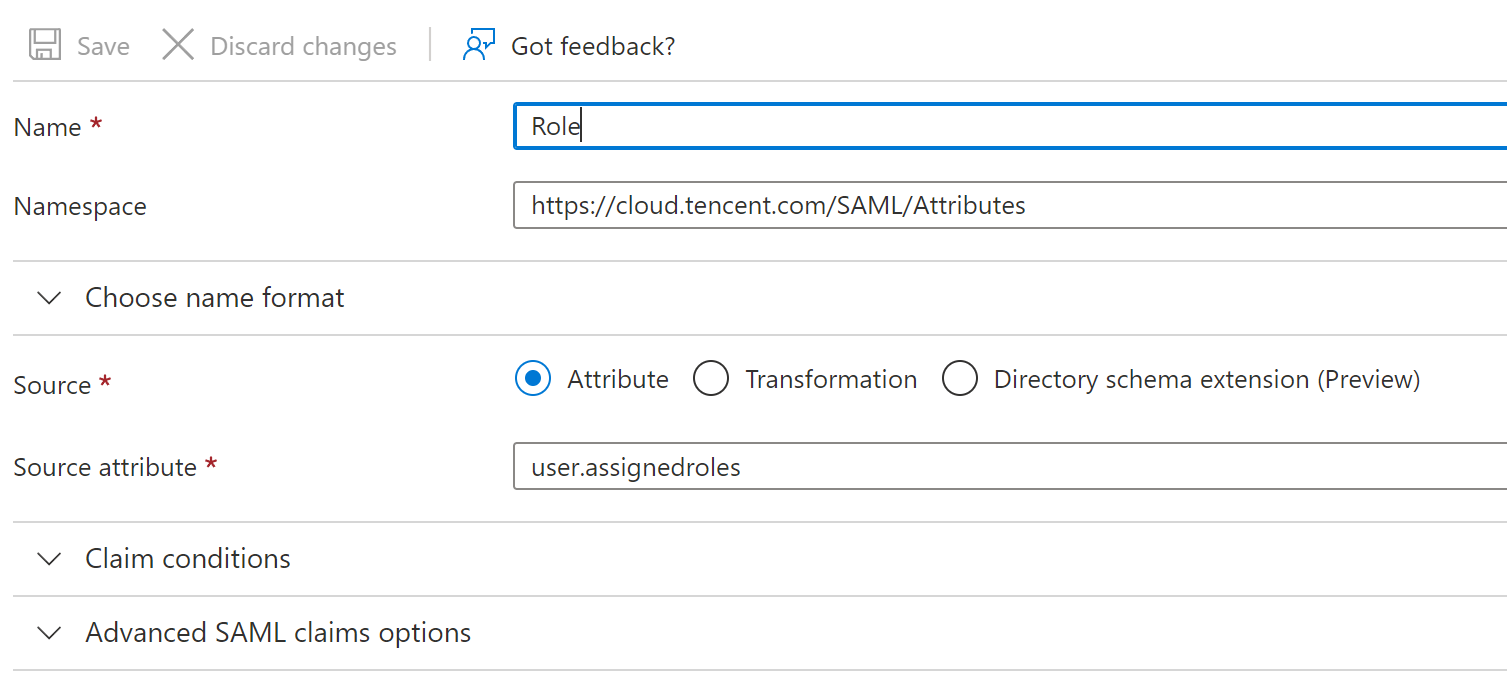
Attributes & Claims
Two additional claims highlighted in the screenshot below need to be added.
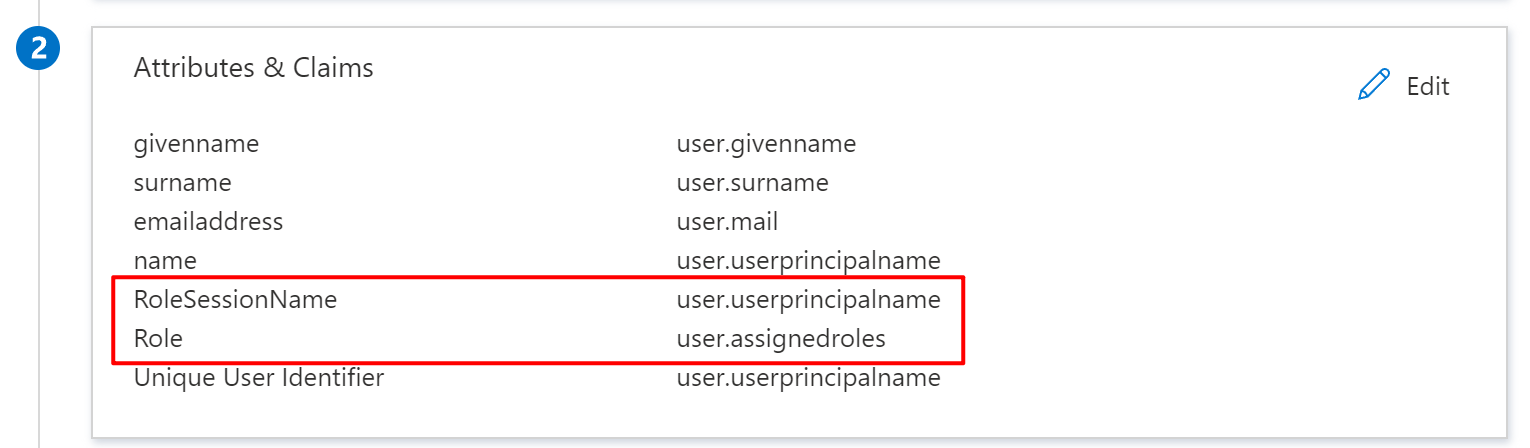
| Name | Namespace | Source | Source attribute |
|---|---|---|---|
| Role | https://cloud.tencent.com/SAML/Attributes | Attribute | user.assignedroles |
| RoleSessionName | https://cloud.tencent.com/SAML/Attributes | Attribute | user.userprincipalname |
The steps to add them are shown below:
Download the Metadata File
Download the metadata file from the third section.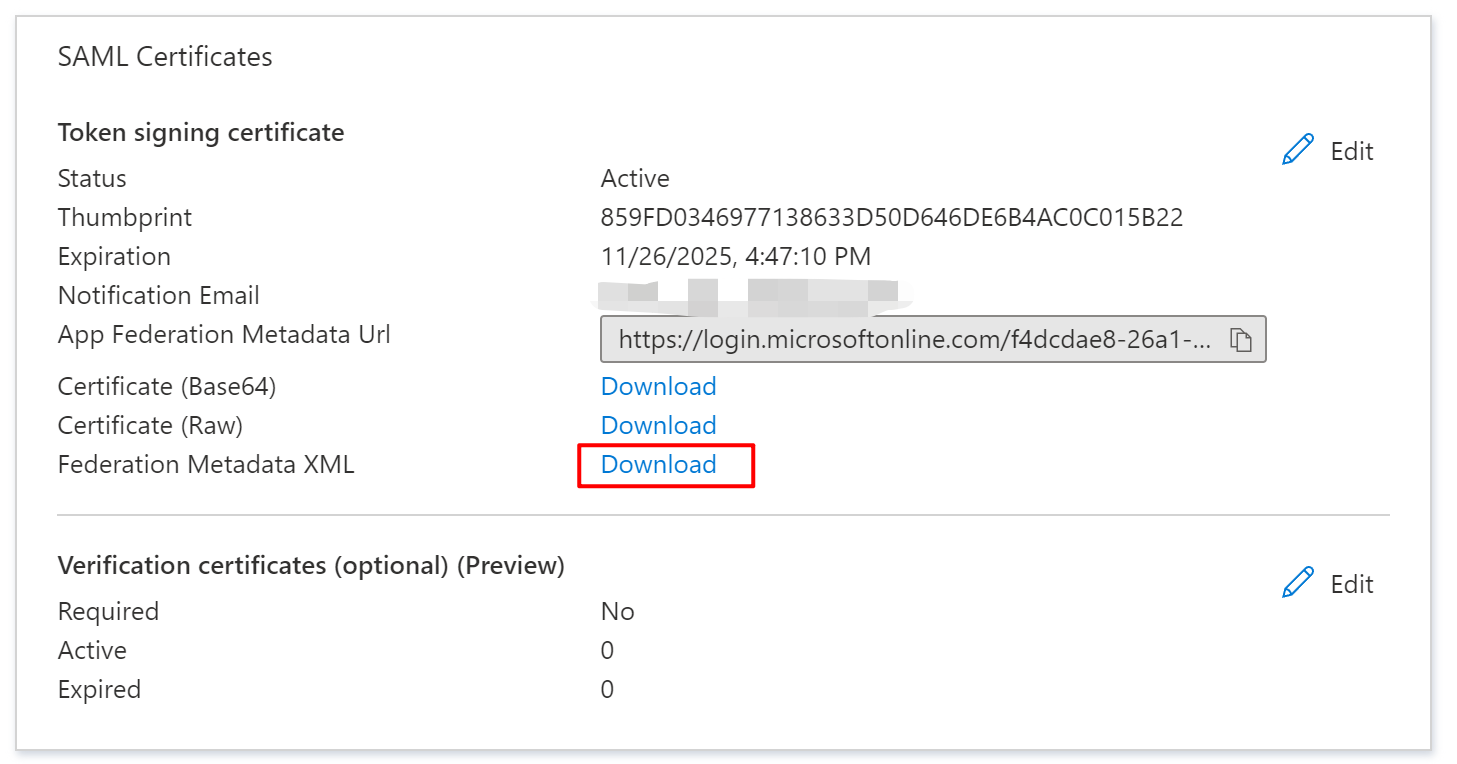
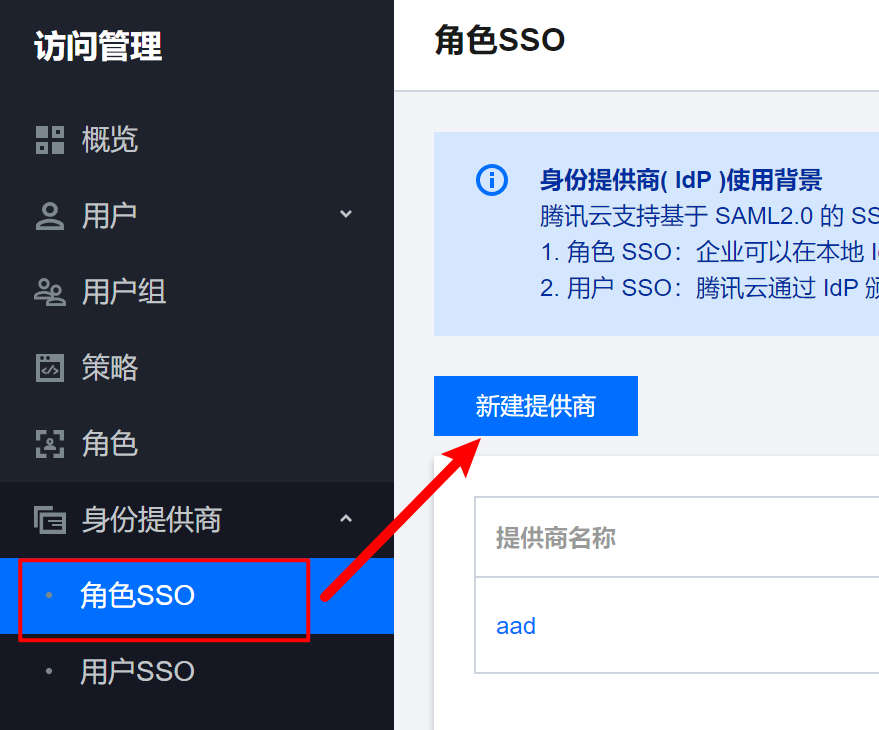
Step 2: Create a Role-Based SSO Identity Provider in Tencent Cloud
1. Create an Identity Provider for Role SSO
Go to Access Management -> Identity Providers -> Role SSO and create a new identity provider.
 Follow the screenshot below to create a new provider. The metadata document is the file downloaded from Azure AD.
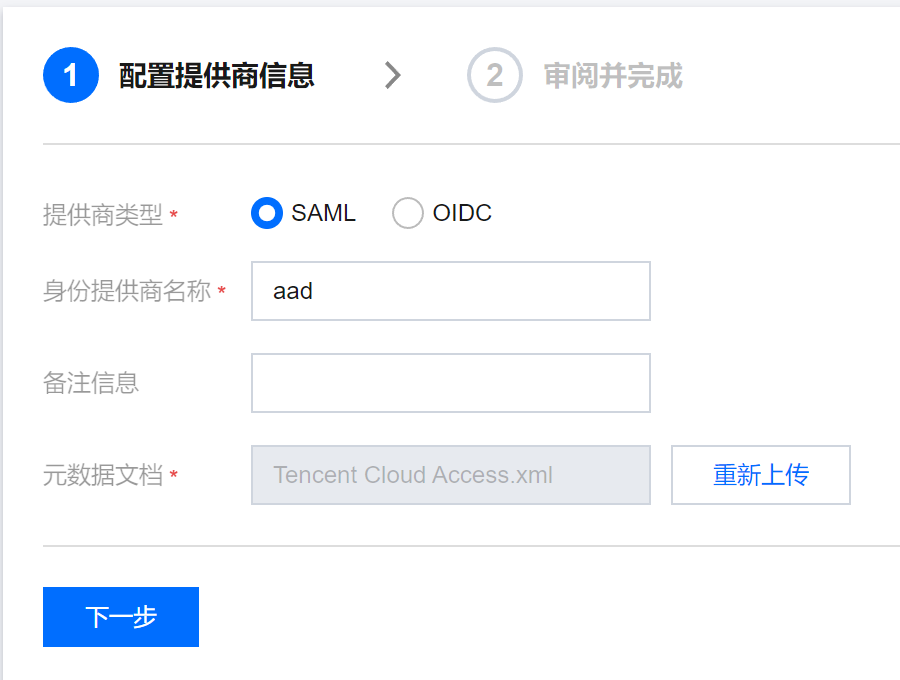
Open the newly created provider and save the login URL.
2. Create Roles
Go to Access Management -> Roles and create one or more roles based on your needs. In this post, two roles are created: Administrator (with full admin permissions) and ReadOnly (with read-only permissions).
The role creation process is as follows:
After clicking “Create Role,” select “Identity Provider” in the dialog box.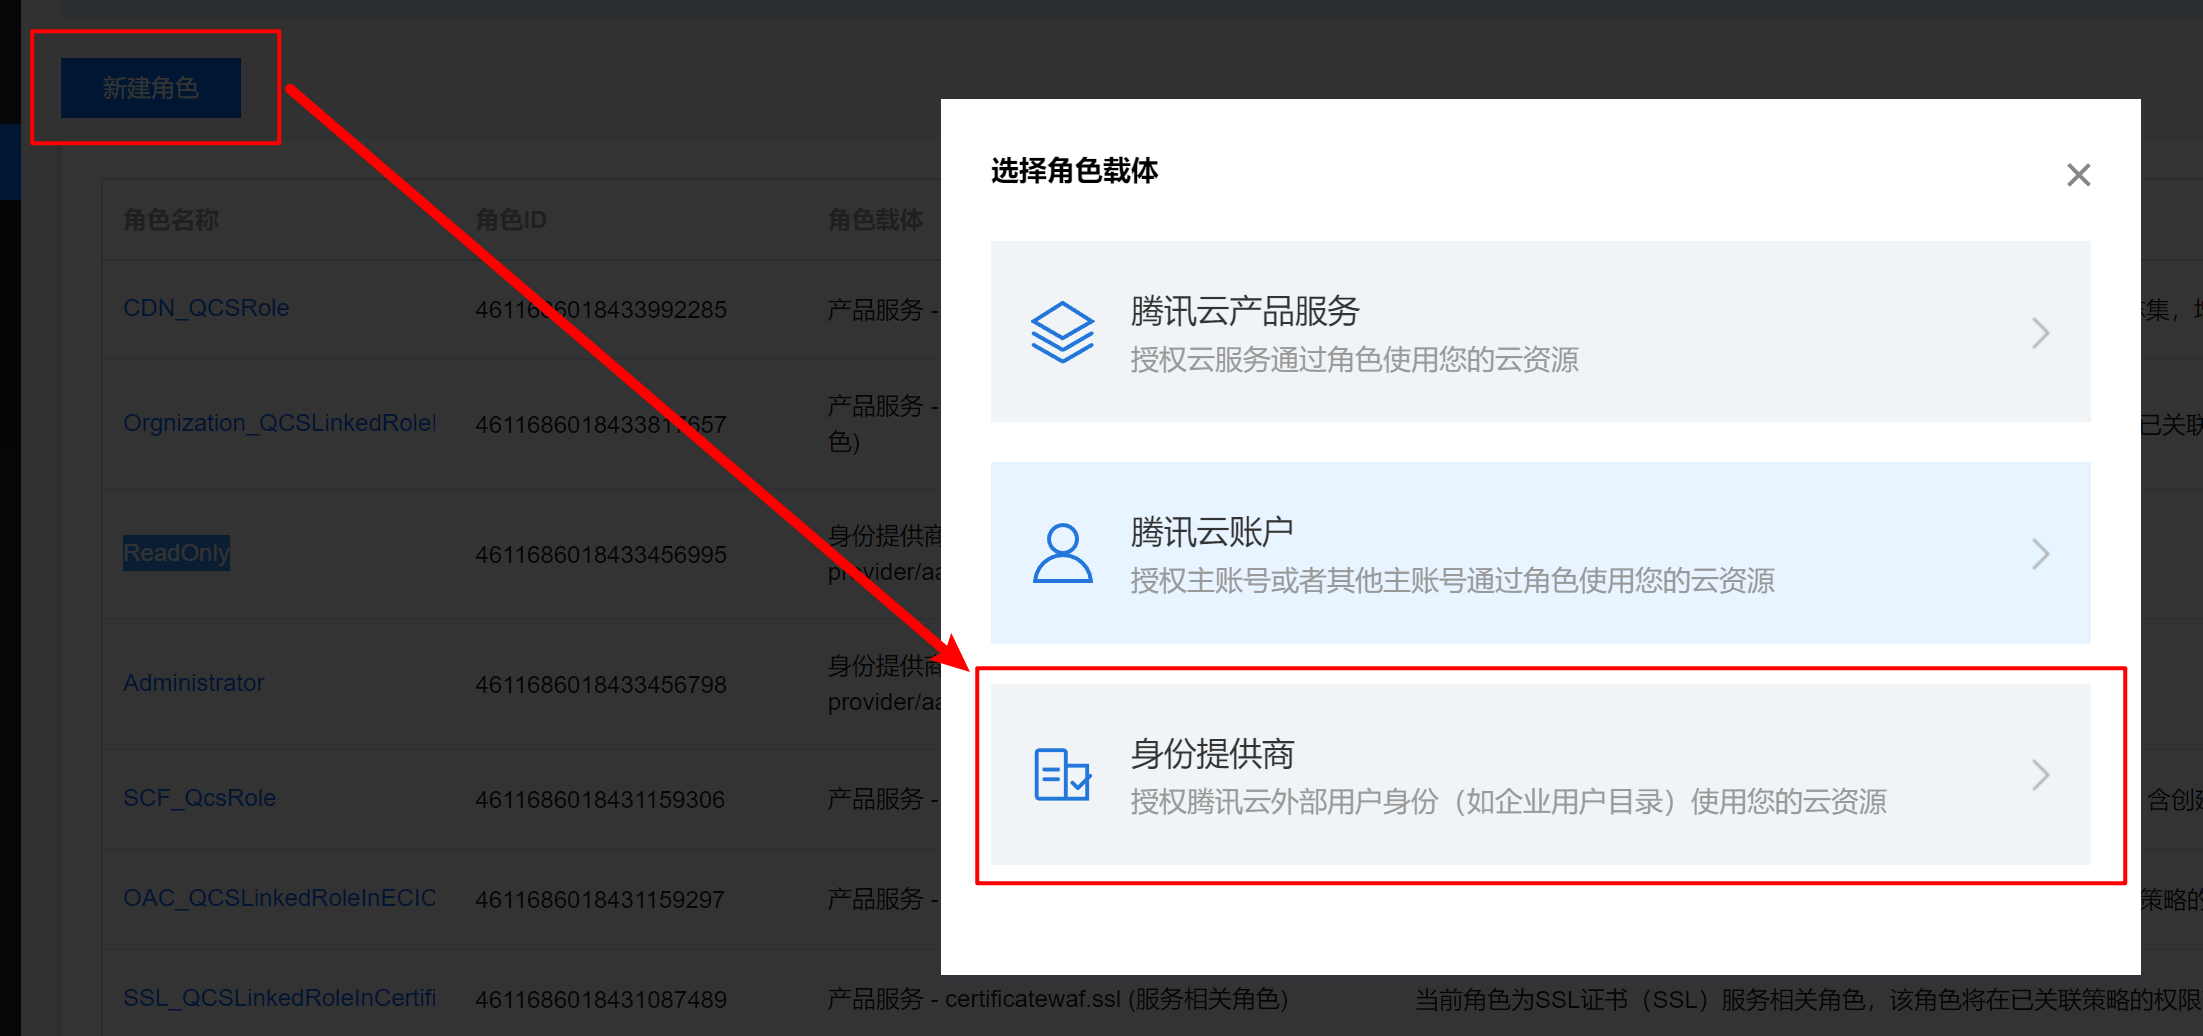
Set the identity provider type to SAML and select the provider created earlier — in this post, that is “aad.”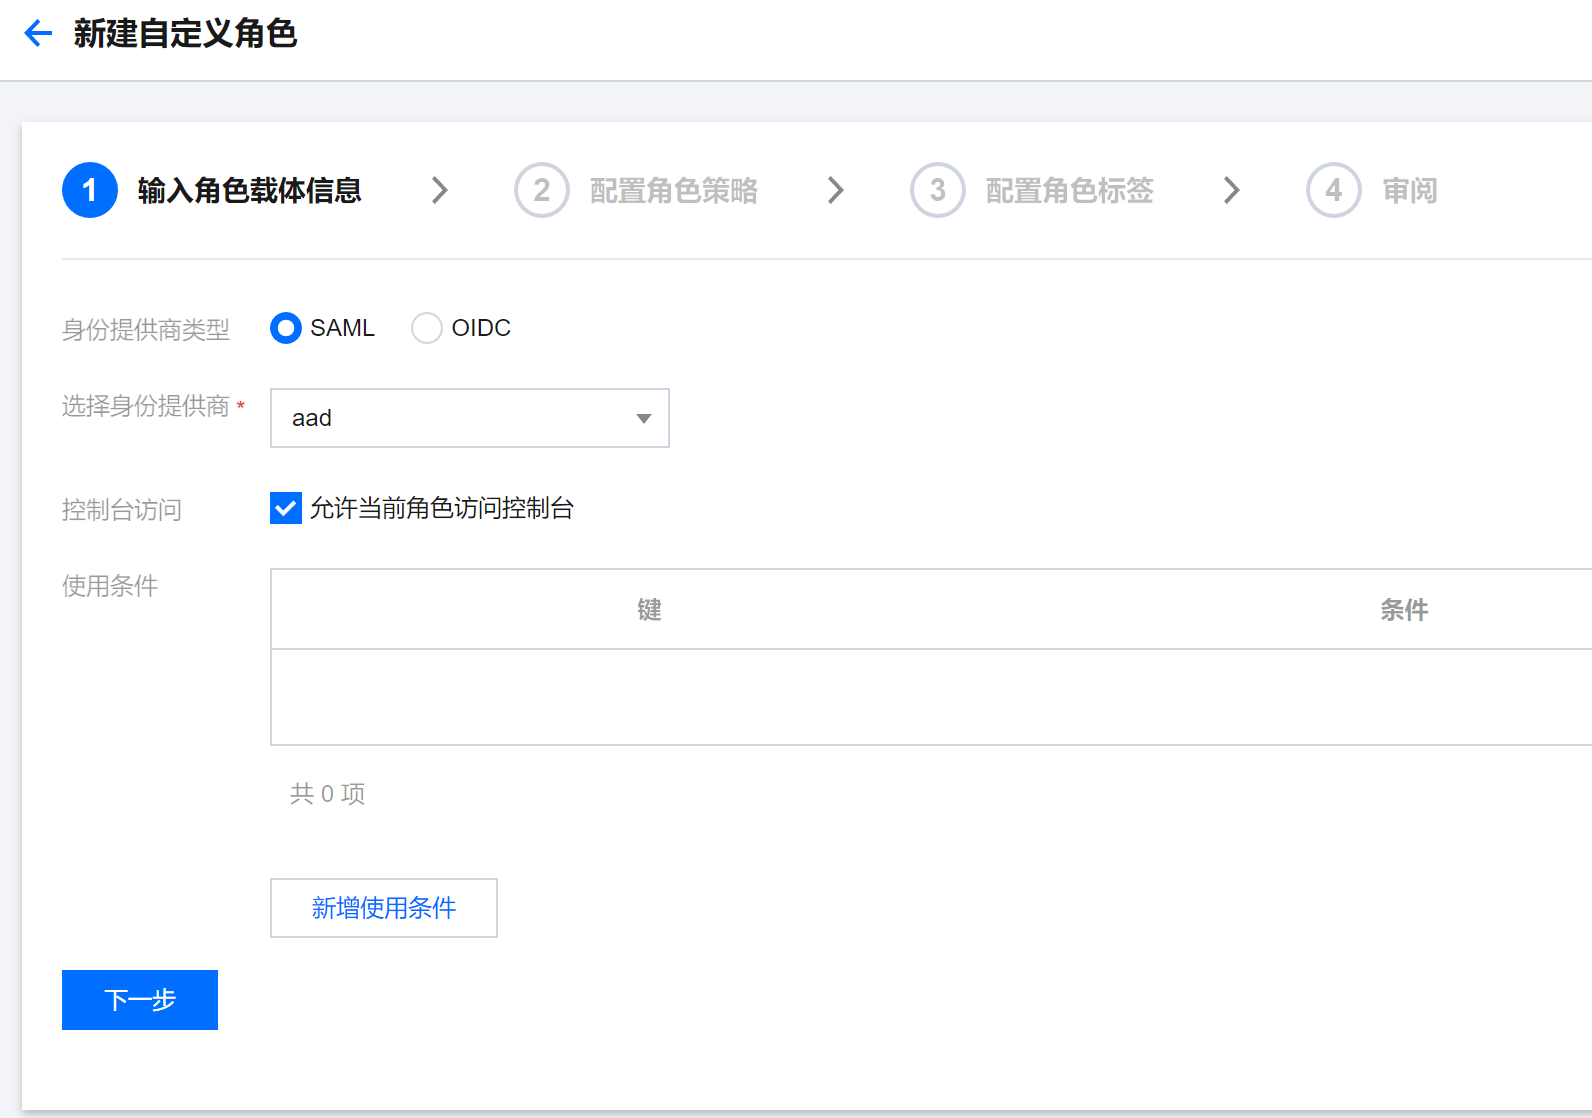
Role policies can be set according to the role’s requirements. Since we are creating an Administrator role here, AdministratorAccess is selected.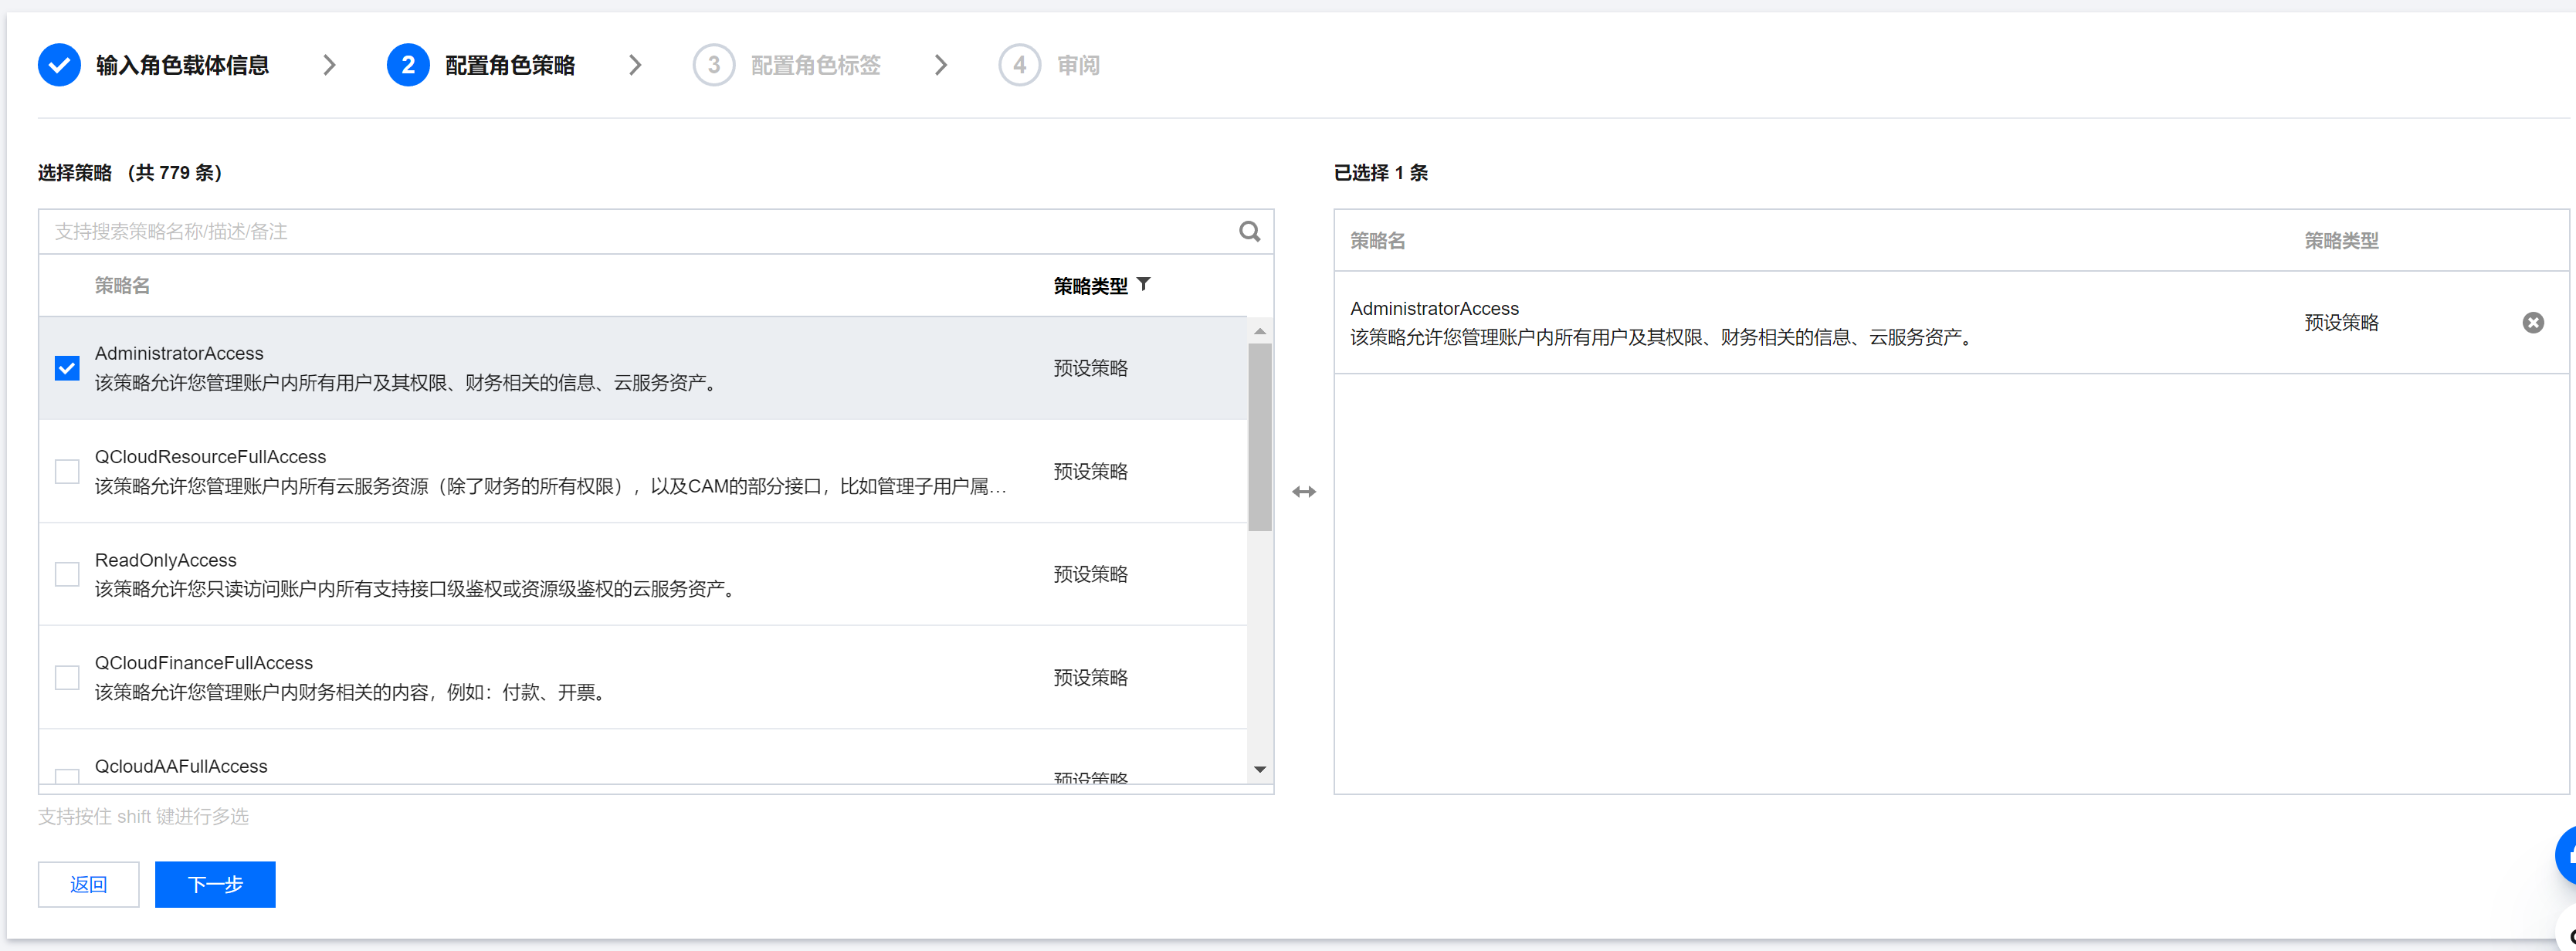
Next, configure role tags as needed. Set the role name in the review step.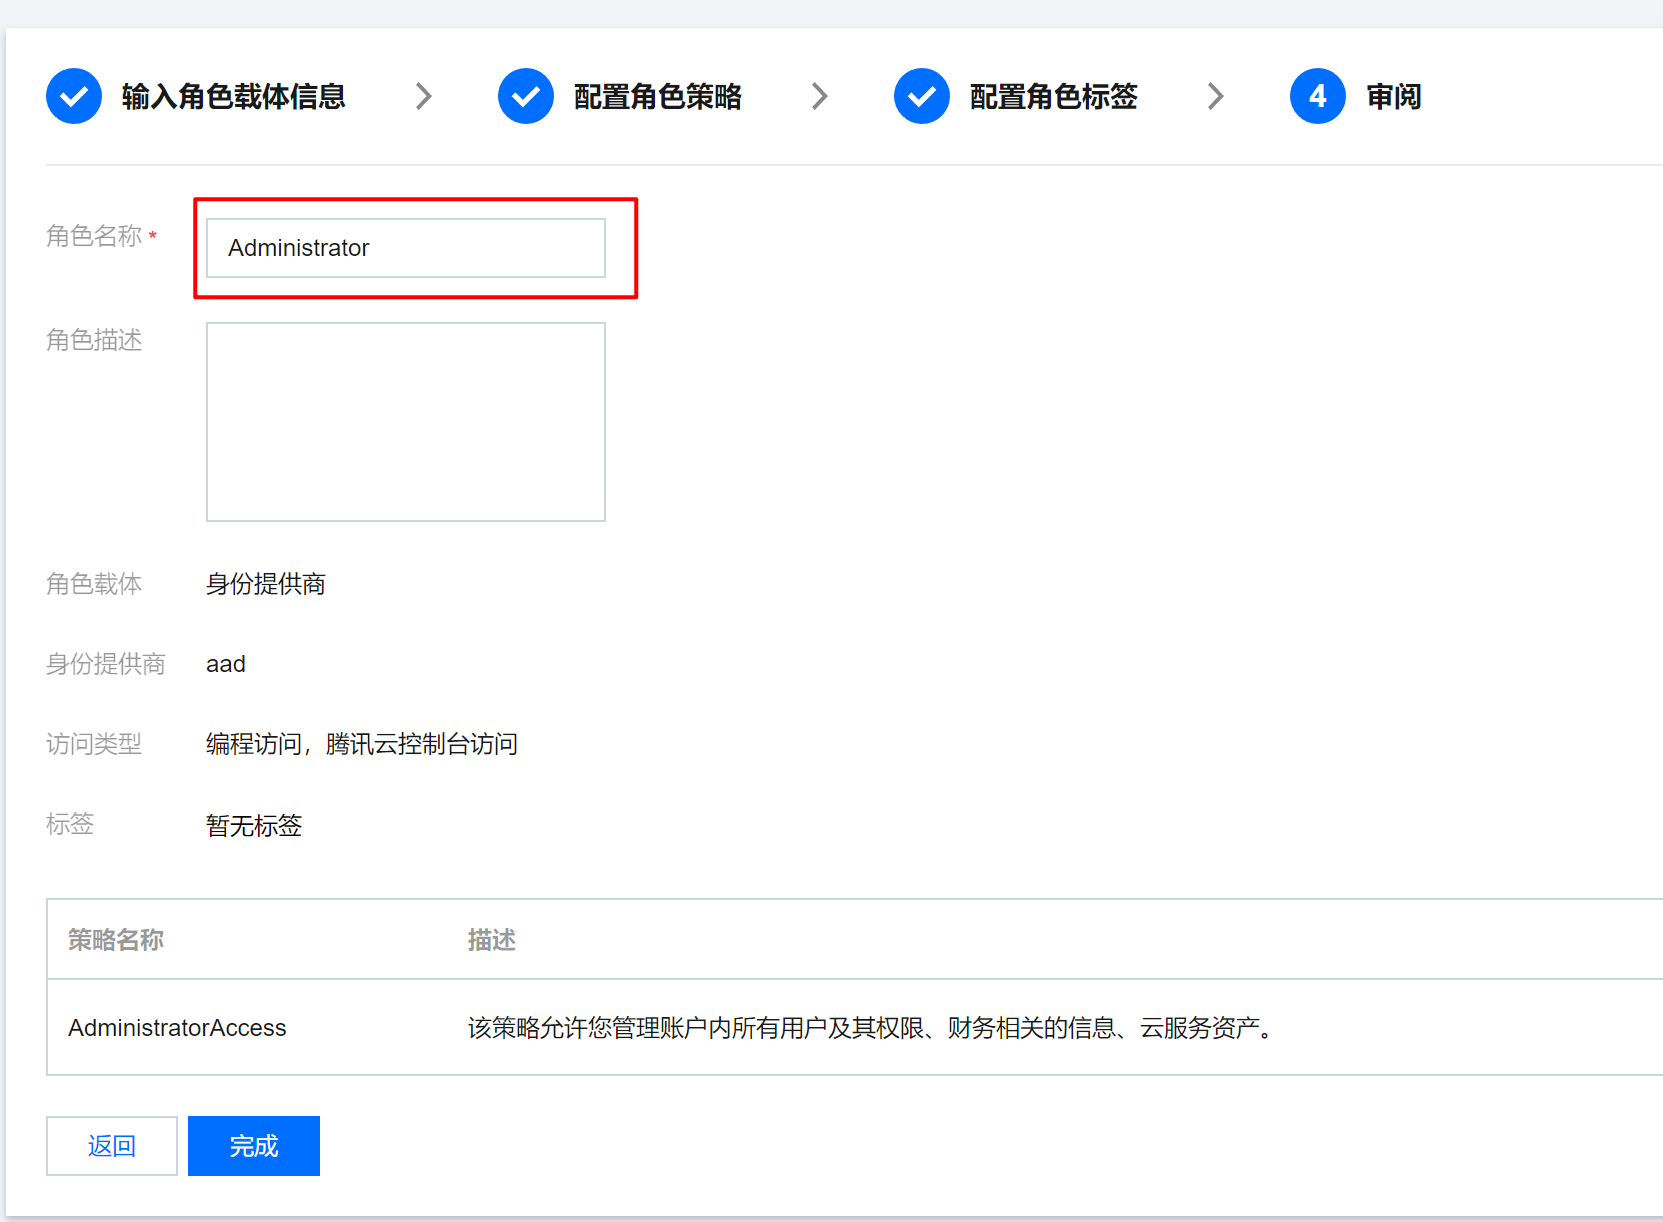
After completion, you will be redirected to the role list. Find the newly created role and open it. As shown in the screenshot below, note two important values: RoleArn and ProviderArn.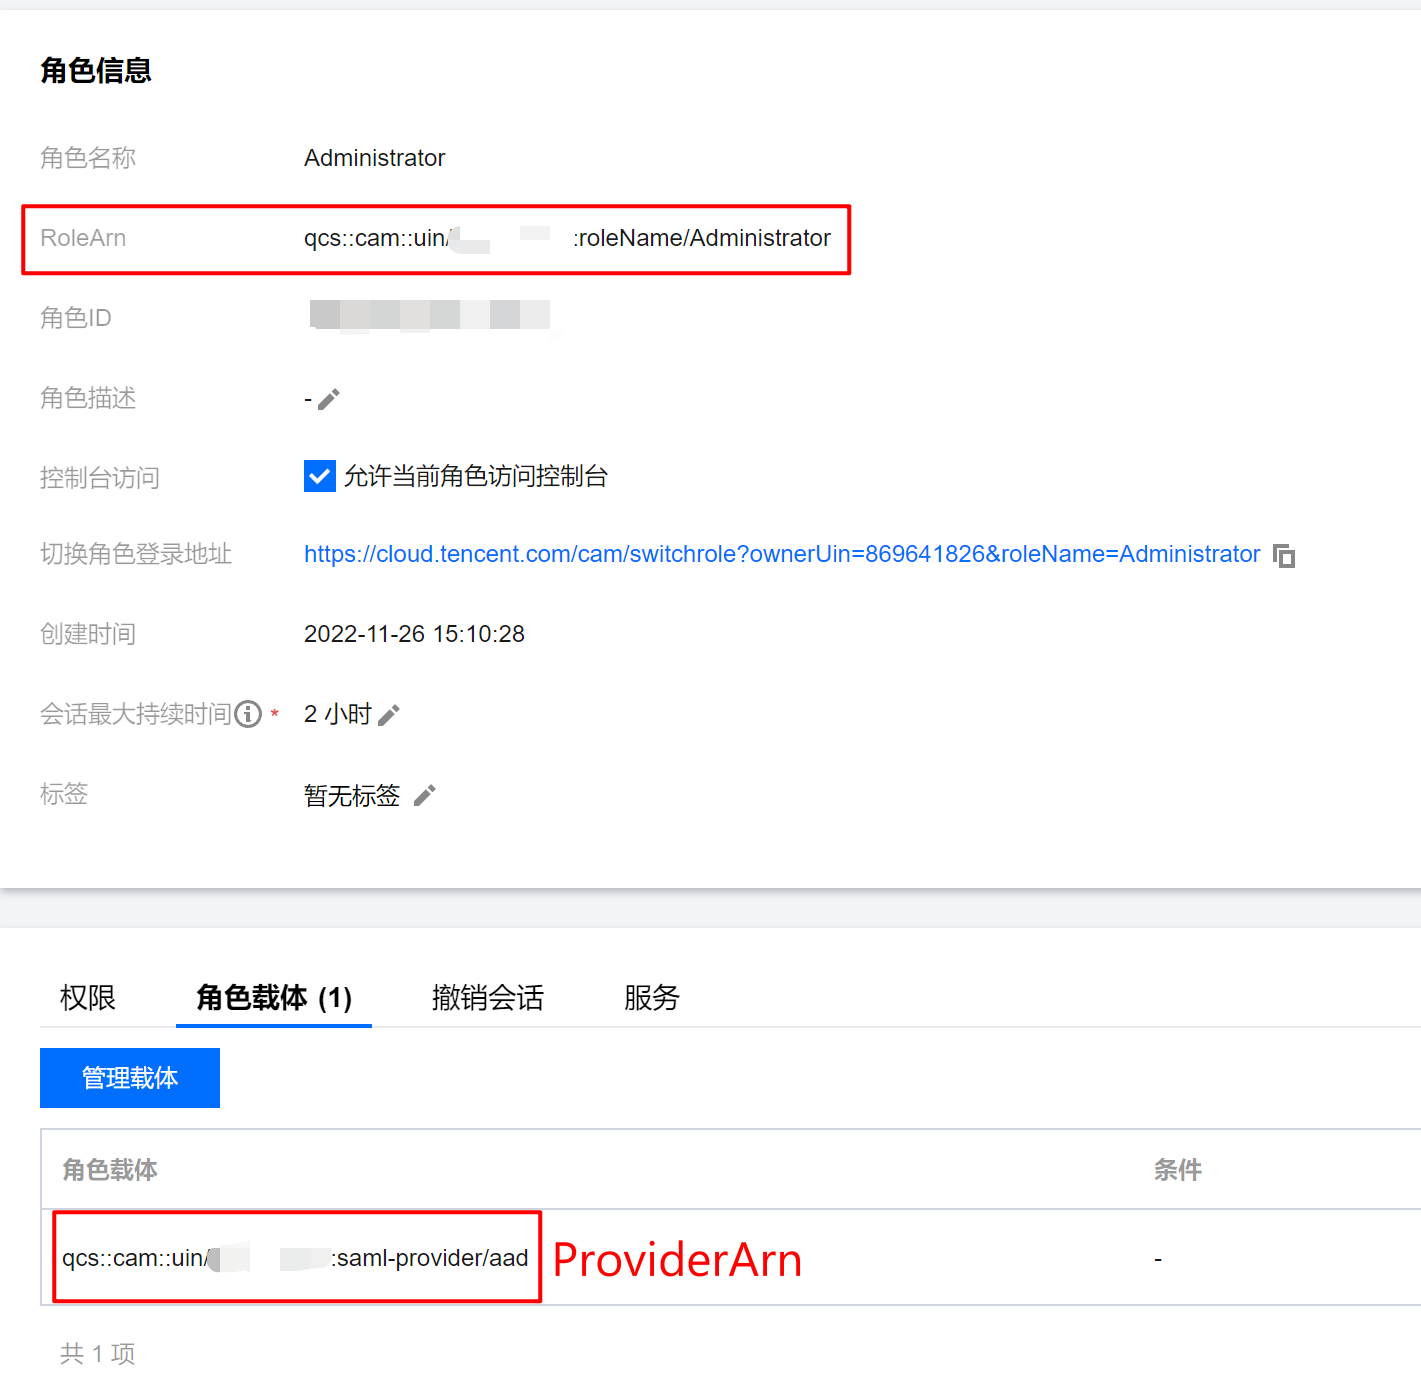
Step 3: Add Roles in Azure AD
Add Roles
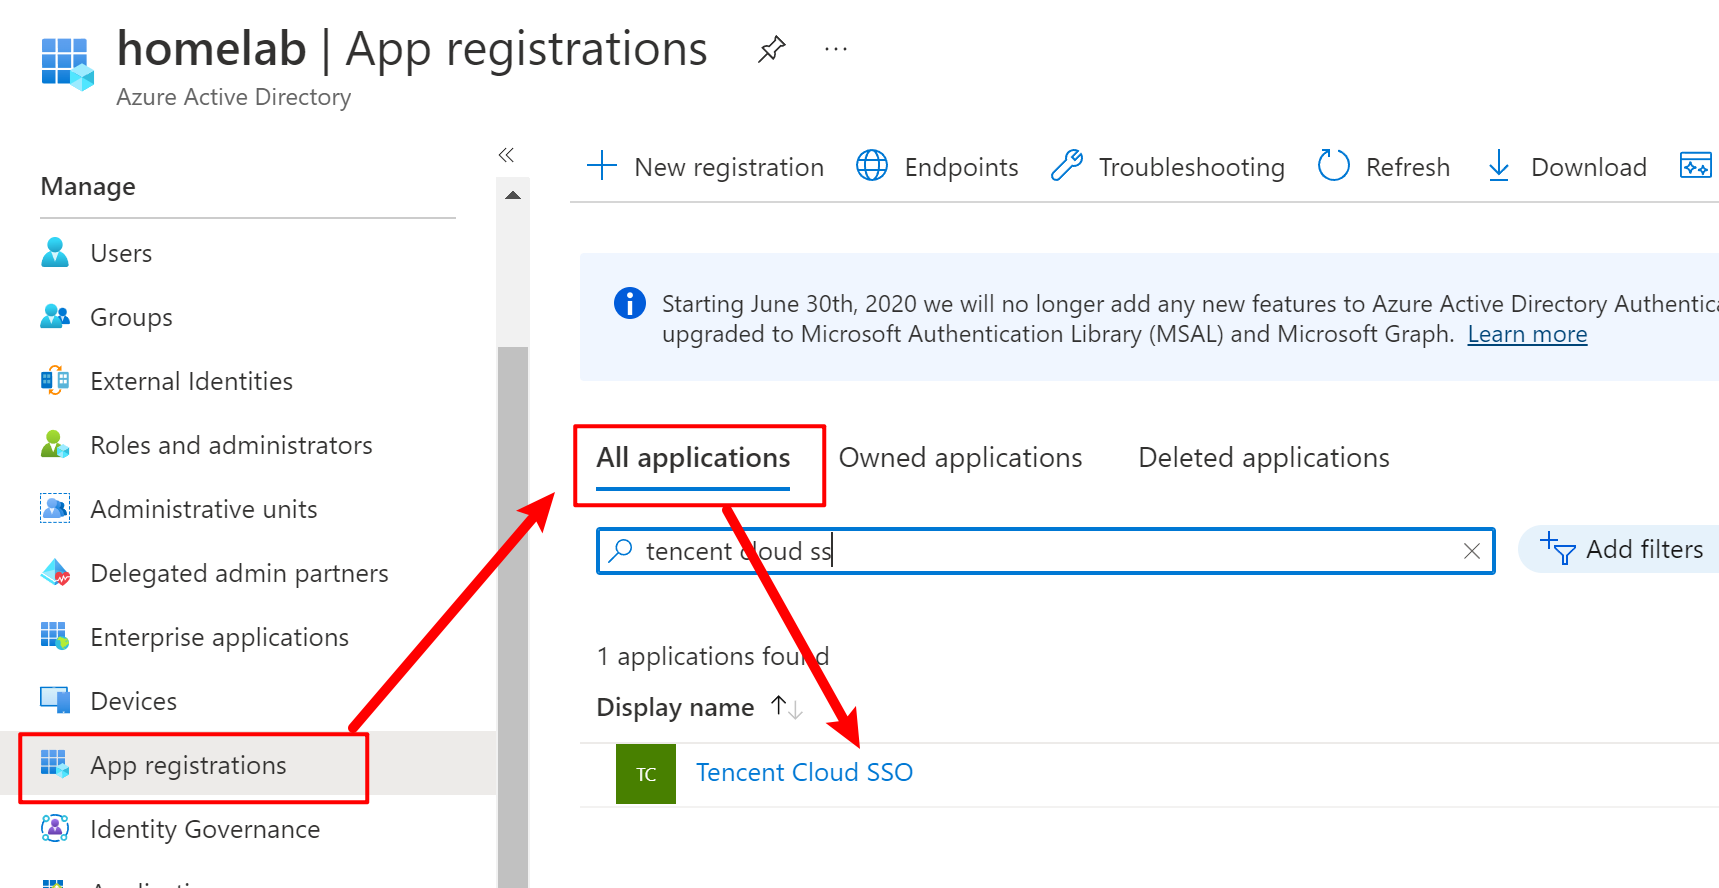
Return to the Azure Portal. In Azure Active Directory -> App registrations, select All Applications, find the application with the same name as the enterprise application, and open it as shown below.
In the Manifest, edit appRoles to add a new role as shown below.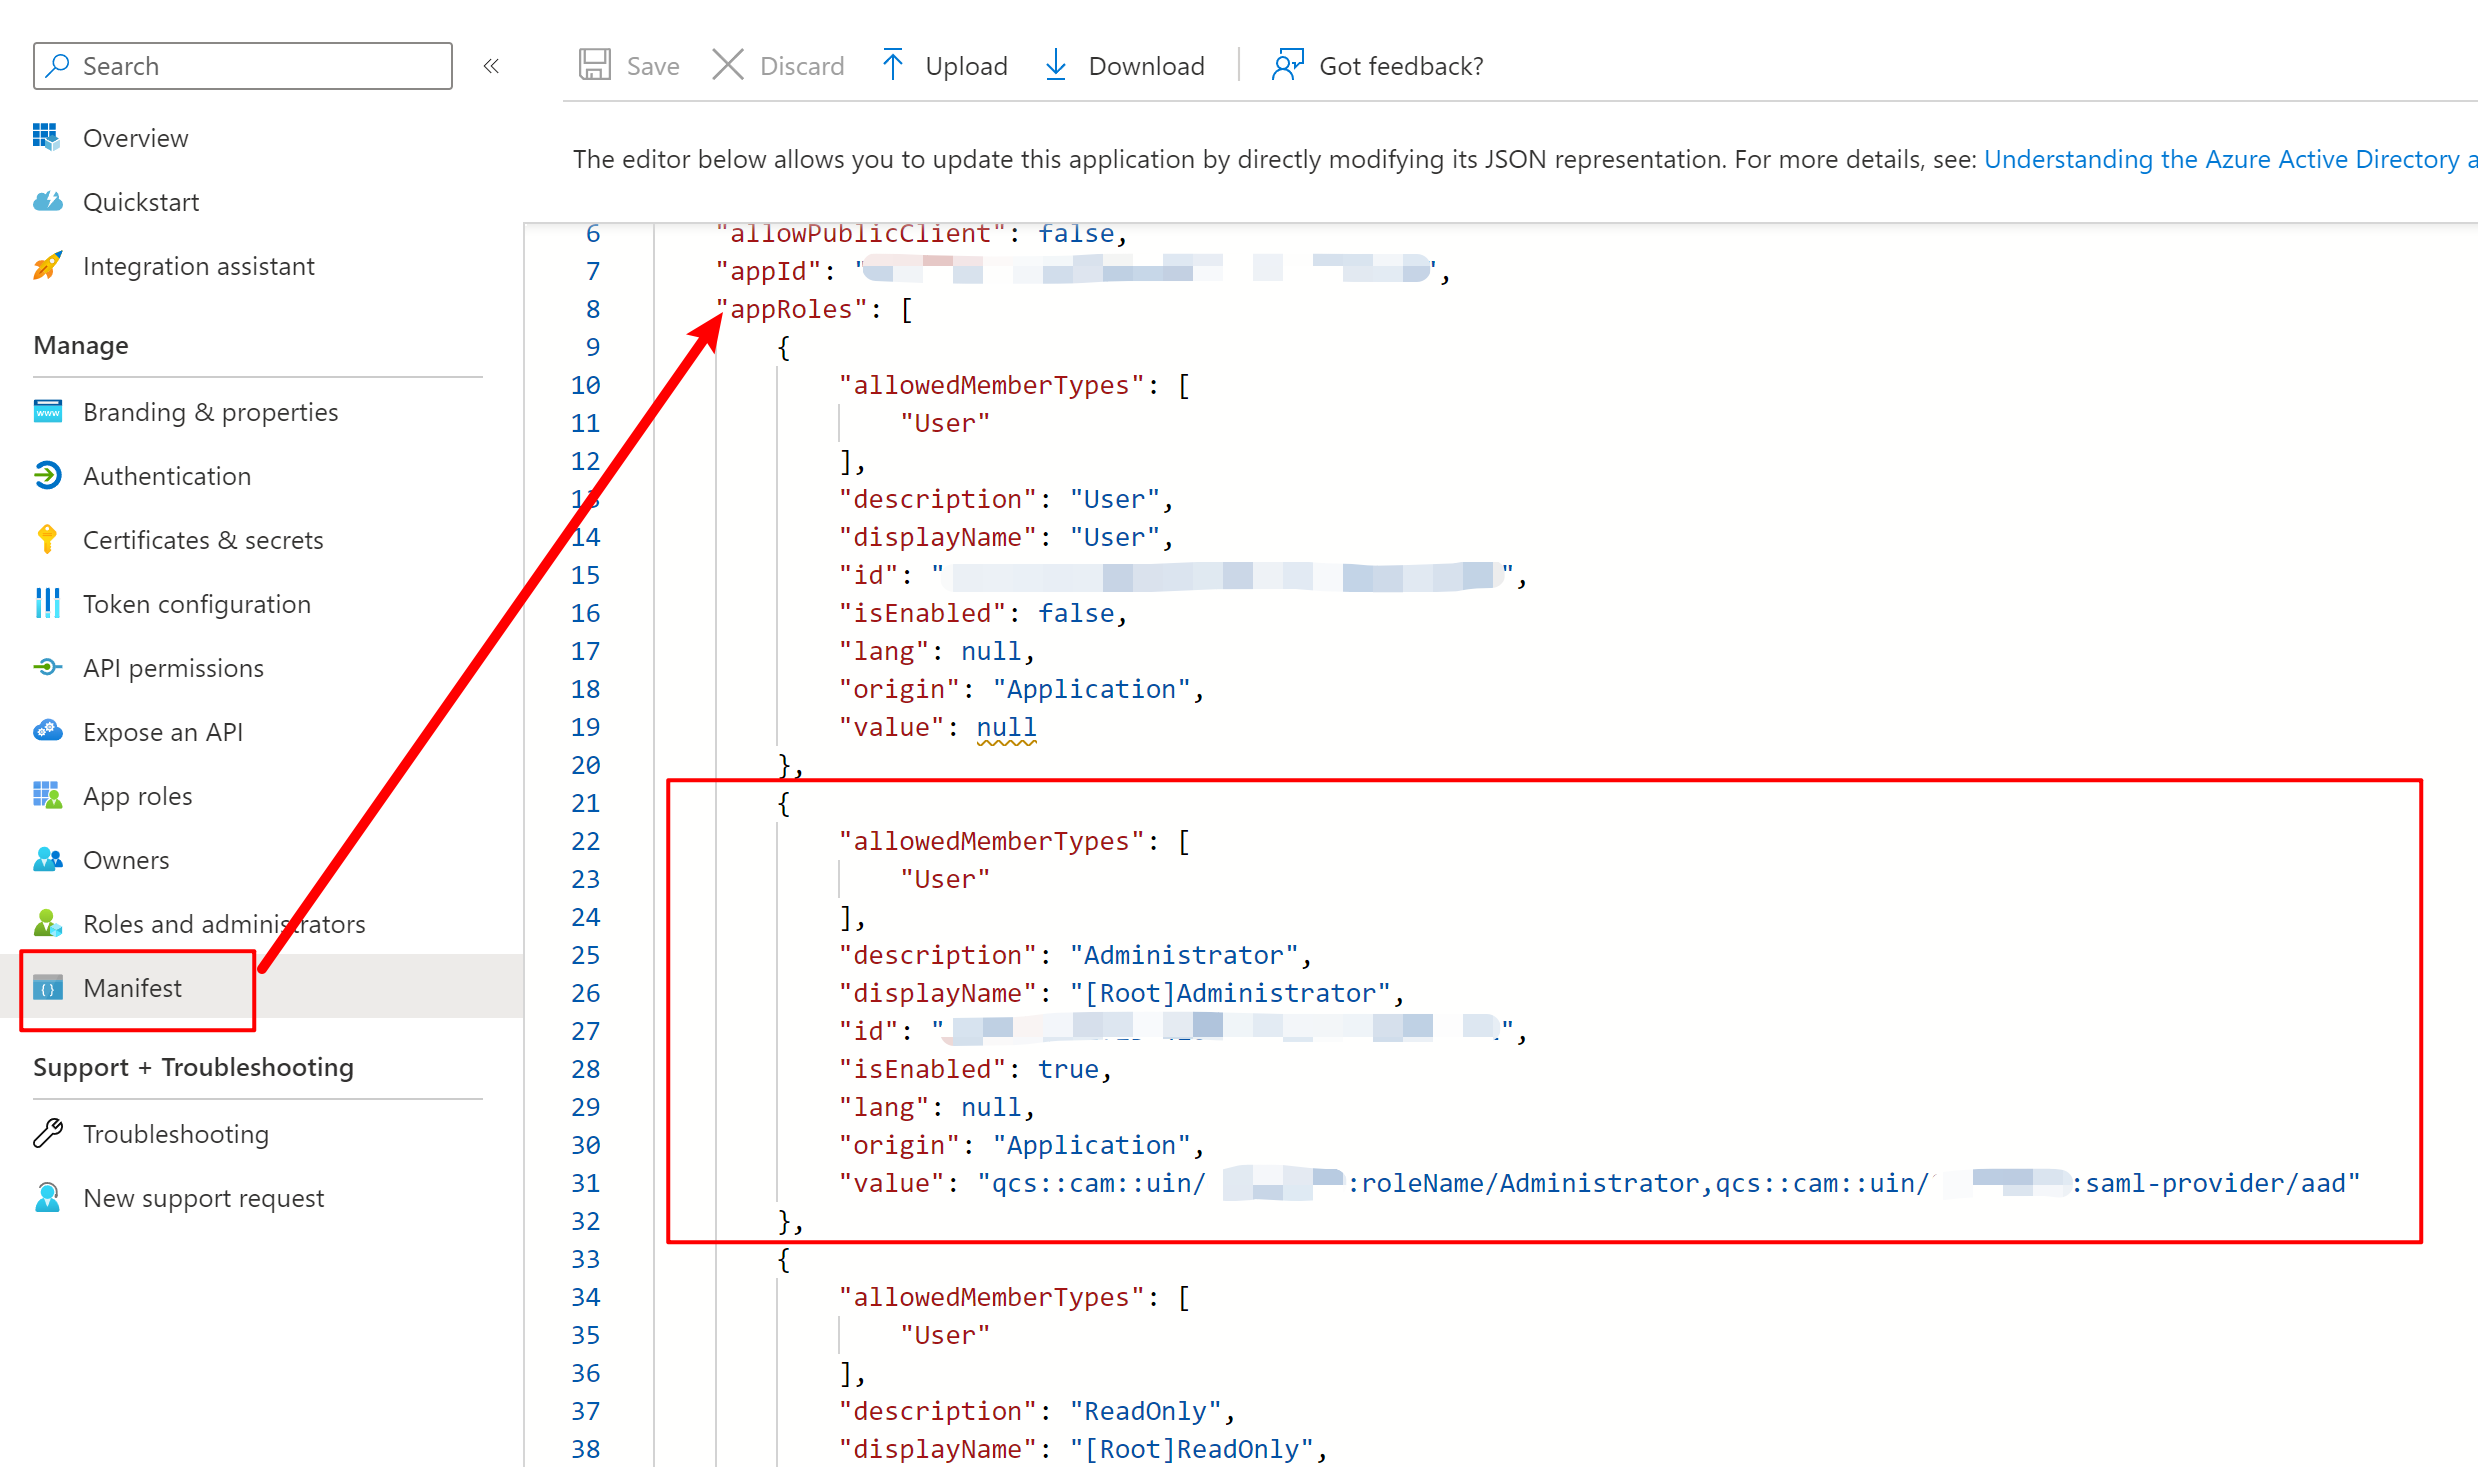
An example configuration is as follows:
1 | { |
Note the following:
- The
idfield is a UUID, which you can generate yourself. - The format of
valueisRoleArn,ProviderArn.
Assign Roles to AD Users / Groups
Go back to the enterprise application, navigate to “Users and groups,” and add users and groups as needed.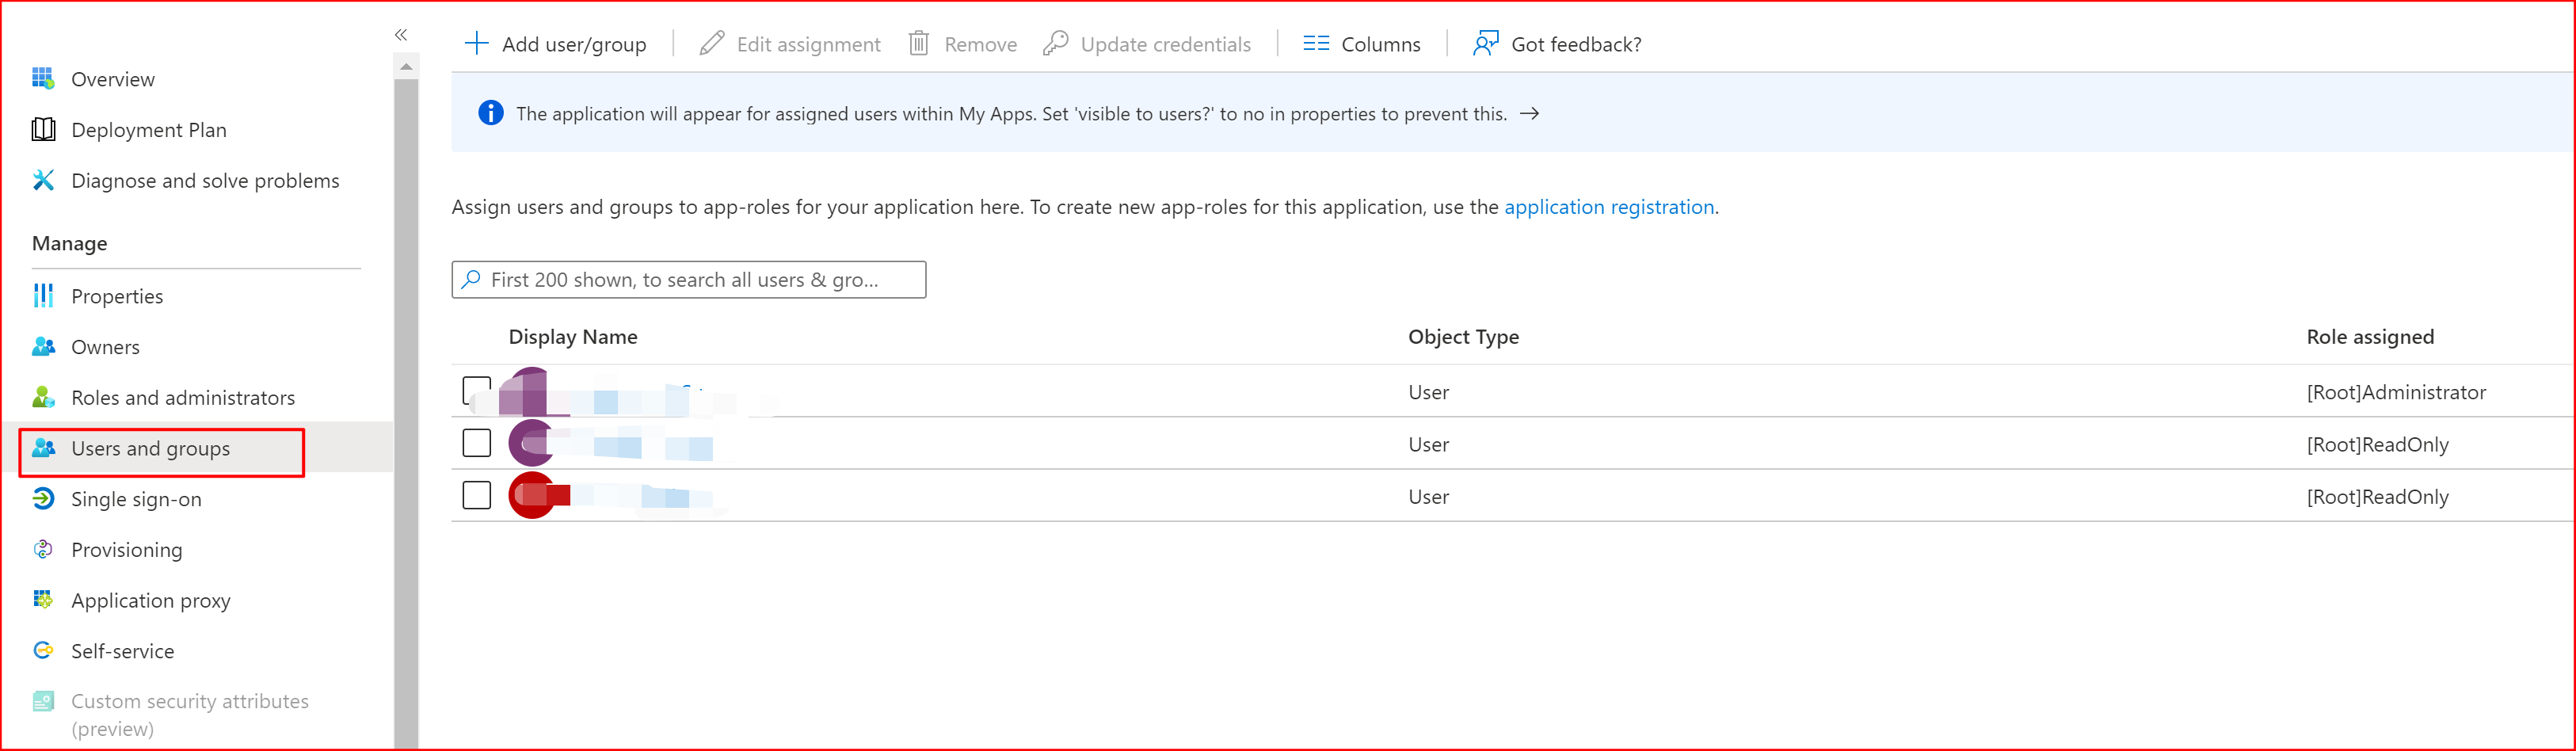
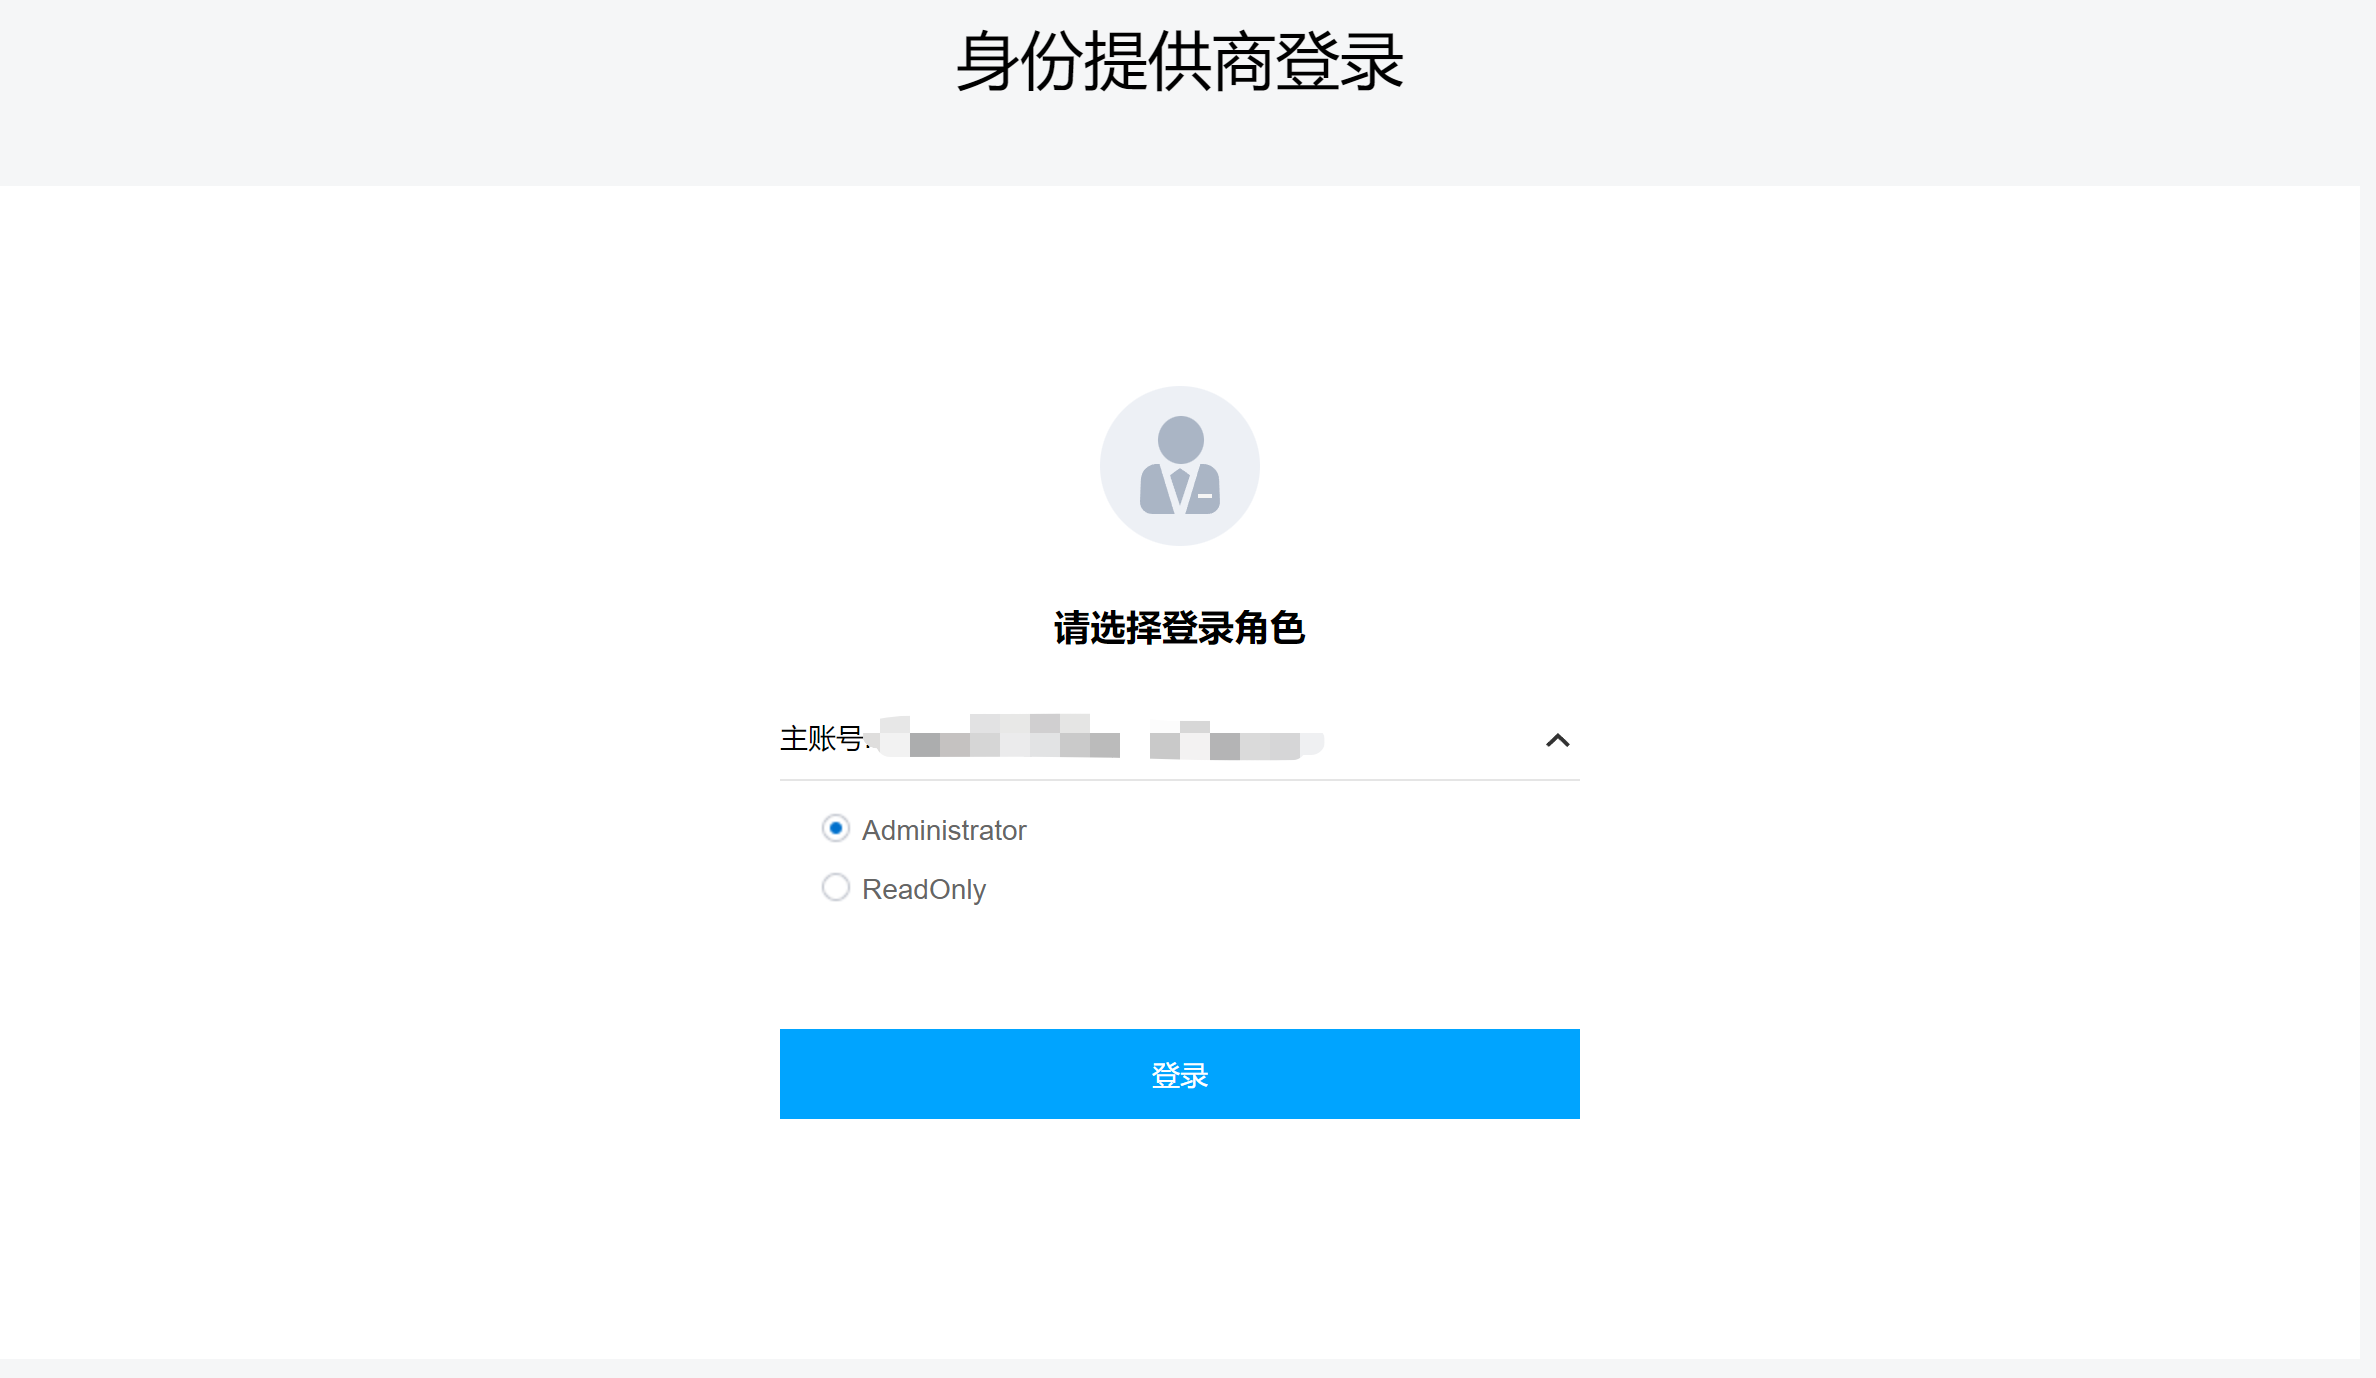
Step 4: Test
Open the login URL from the Role SSO section. You should see the following screen.